How to record the odontogram in a consultation
On this page
The odontogram is recorded inside a consultation, with the Consulta Odontológica template, and it is signed along with it. Each mark is a clinical fact of that visit: what you found, what you plan, what you did and what the patient already had. From those marks, without typing anything again, come the visit’s ICD-10 diagnoses, the prestaciones that get billed, the treatment plan and the patient’s COP-D index (DMFT).
Before you start
- Your professional profile must have the Odontología or Ortodoncia specialty. That way a new consultation opens the dental template by itself.
- The odontogram turns on once the consultation has been saved: write the Motivo de consulta and wait for Guardado.
Open the consultation
- In the patient’s profile, click Atender ahora.
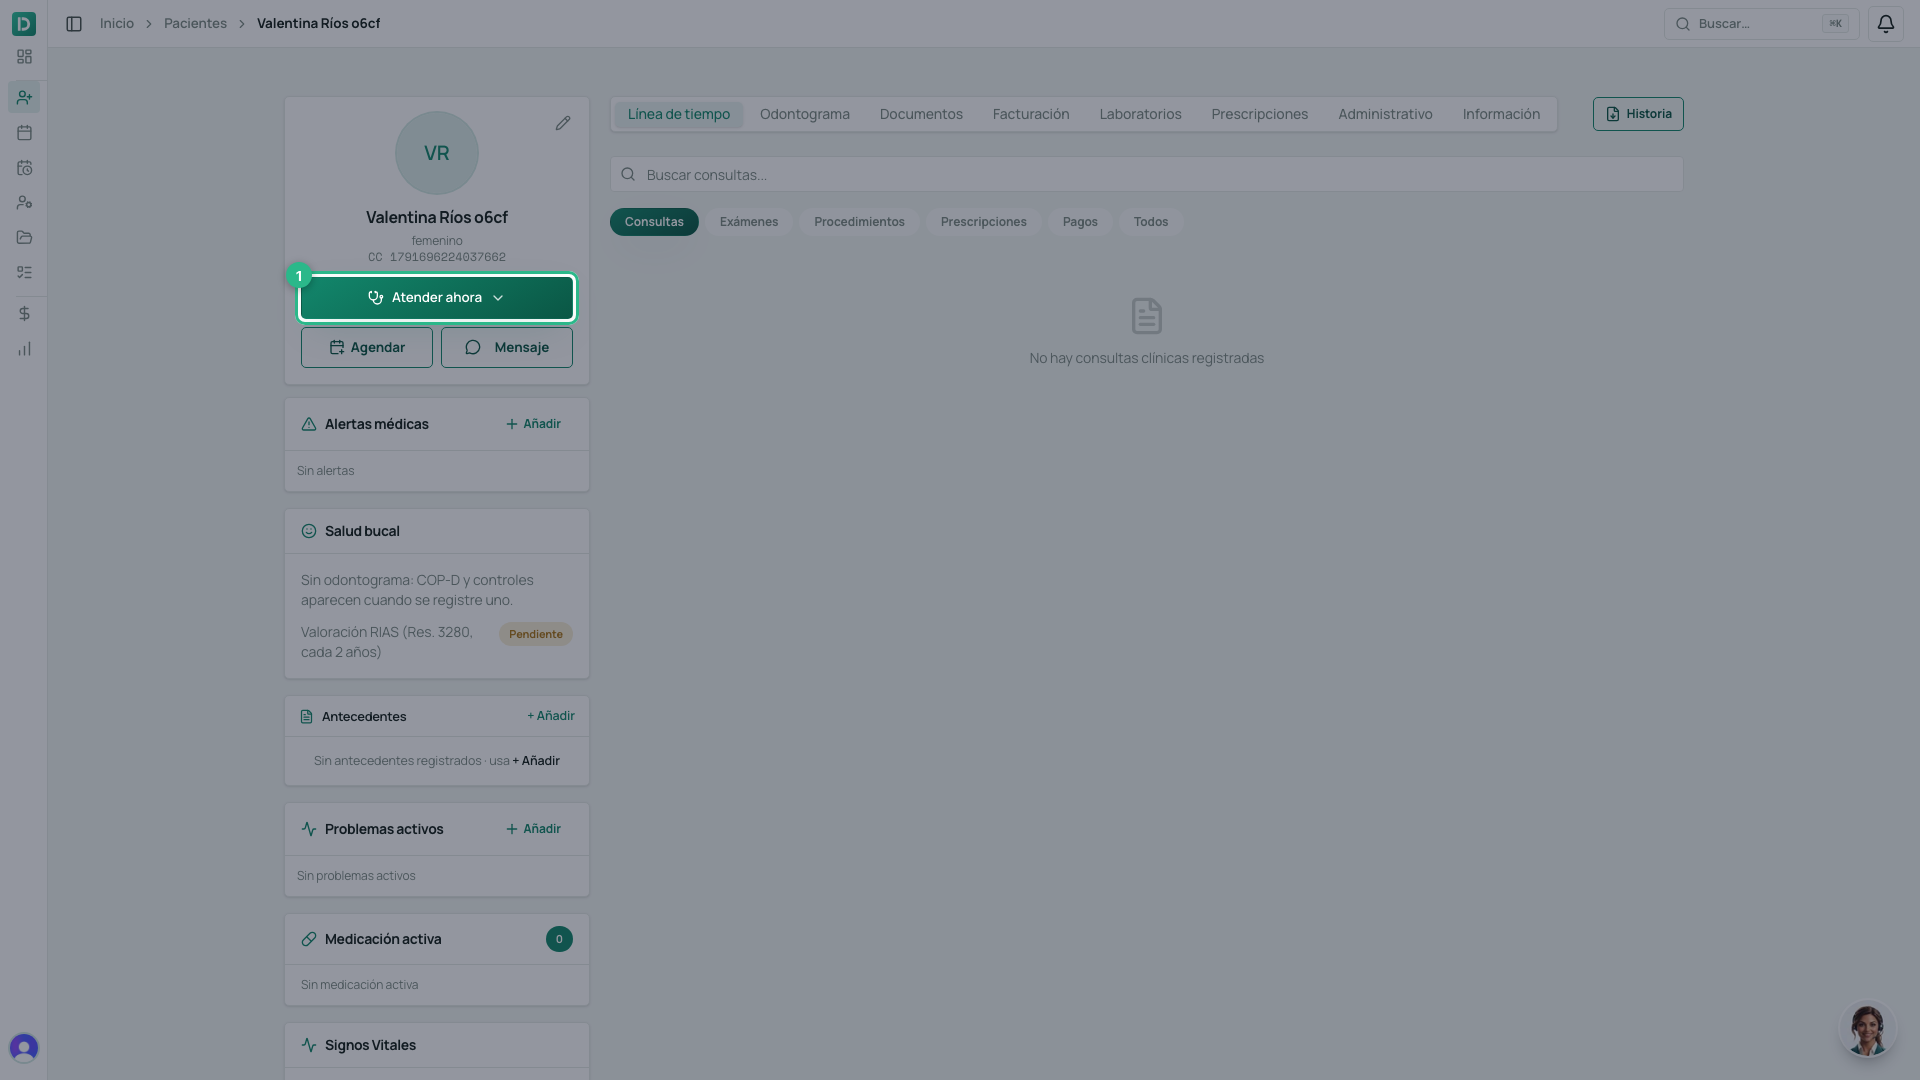
- Choose Consulta.
- Write the Motivo de consulta. The consultation saves by itself.
- Scroll down to Odontograma, under Campos de plantilla · Consulta Odontológica. You see the whole mouth in permanent dentition; at the top you switch to Temporal (primary) or Mixta (mixed).
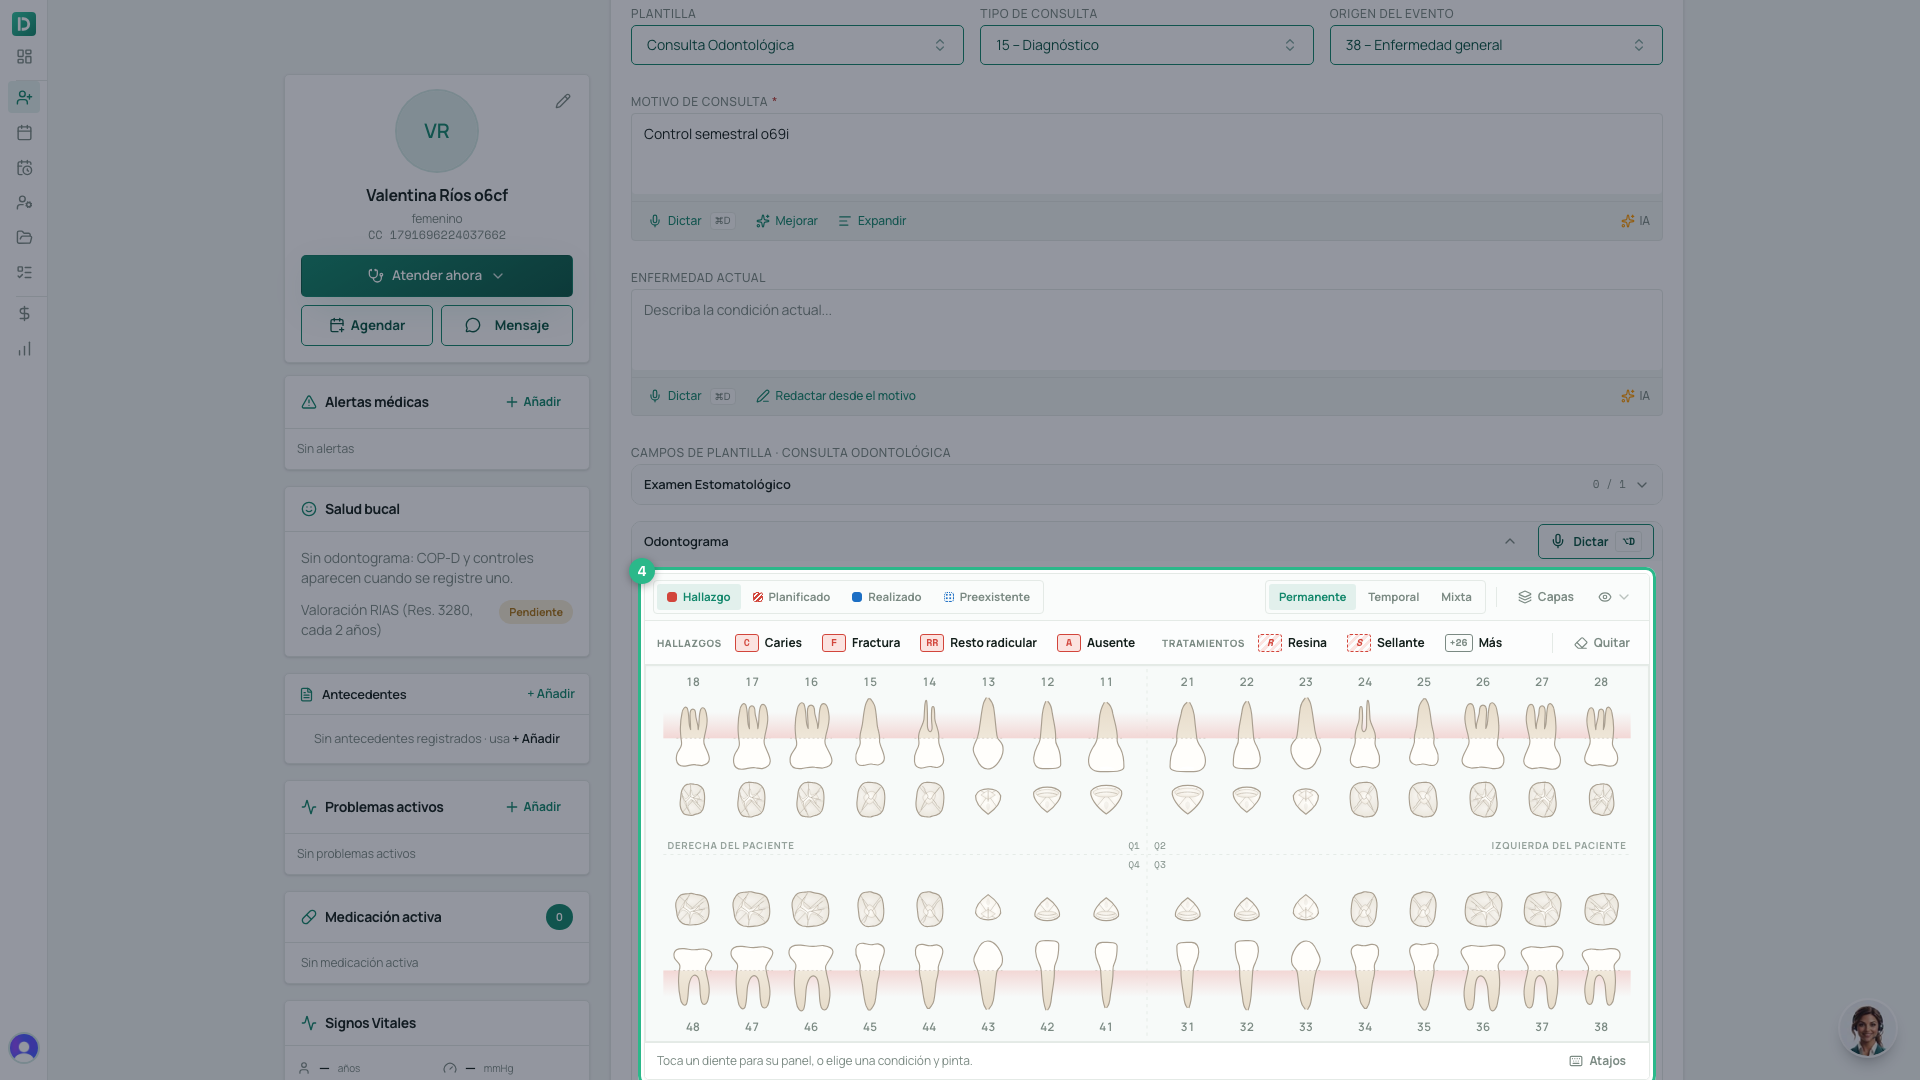
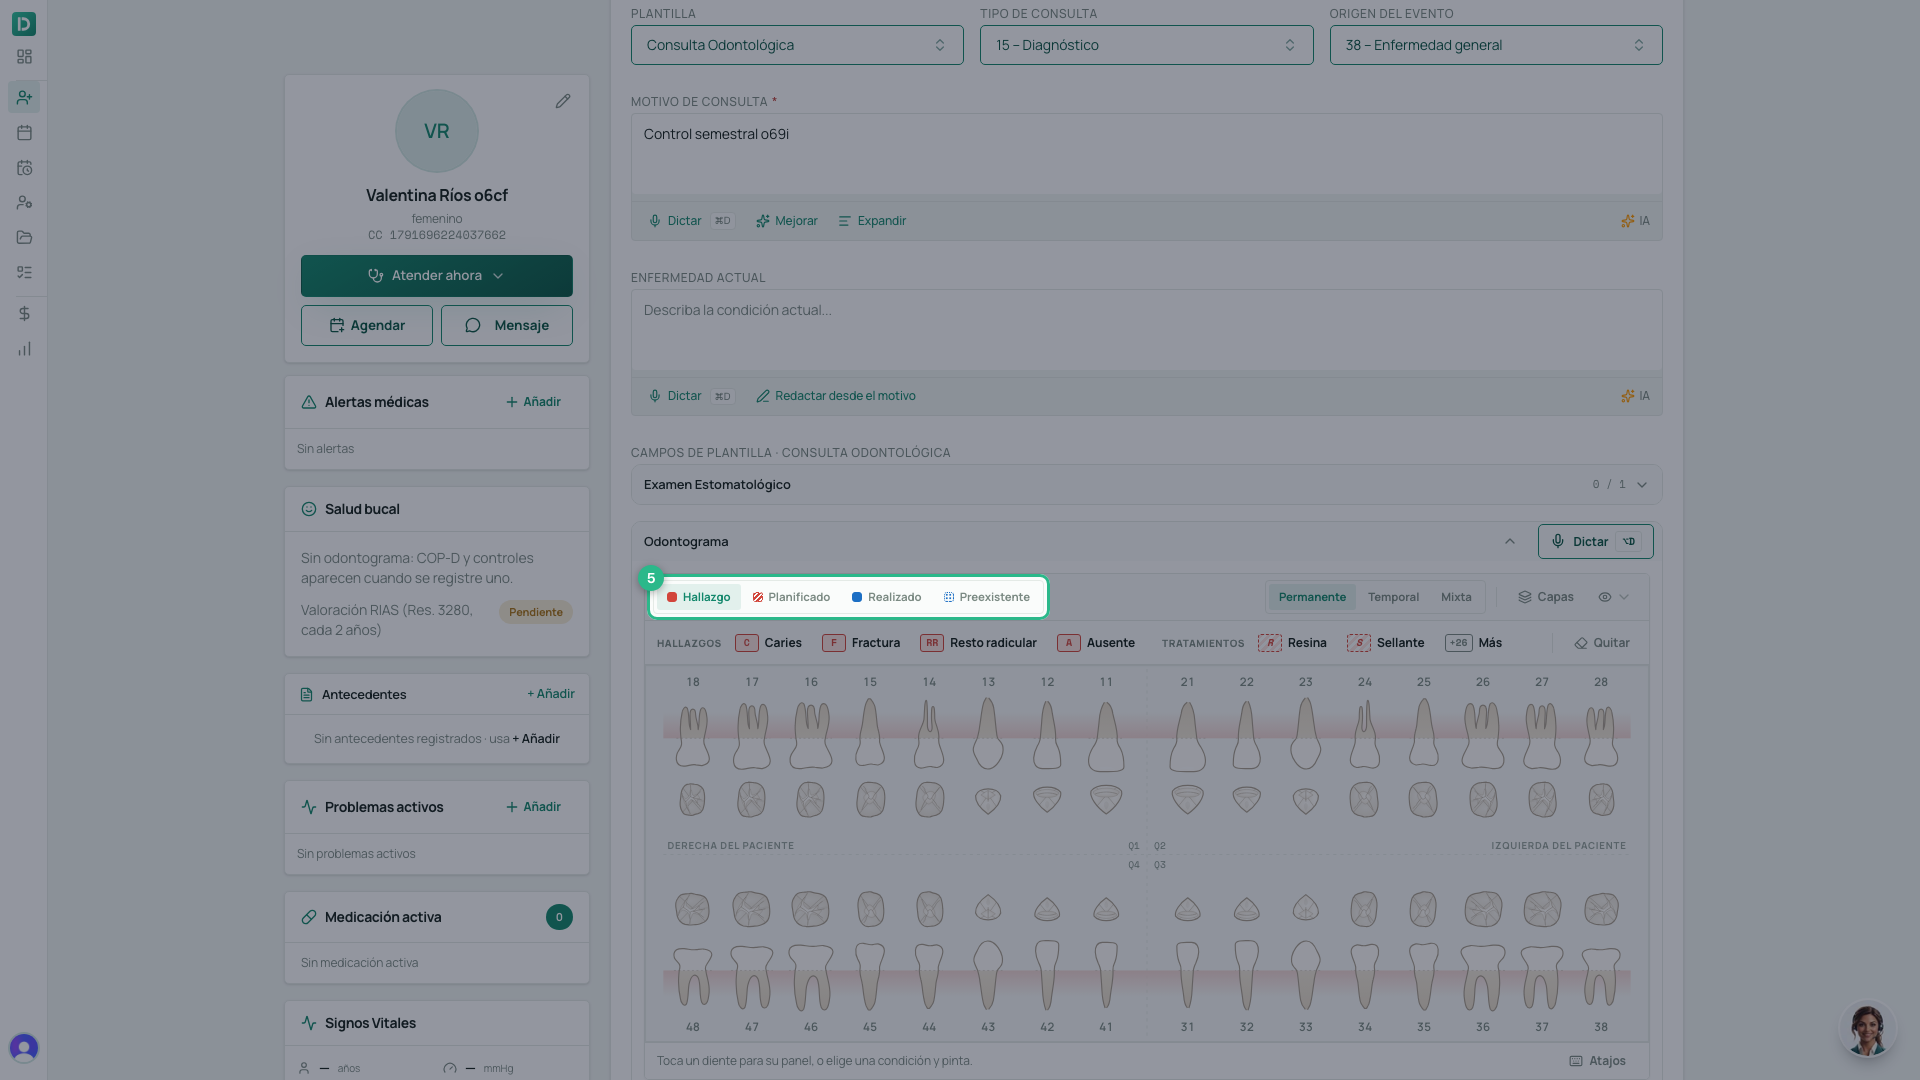
- Registrar como sets what you are marking, and each state has its own
colour:
- Hallazgo (red): what you found today.
- Planificado (hatched): what you are going to do; it feeds the treatment plan.
- Realizado (blue): what you did in this visit; it is billed.
- Preexistente (grey): what the patient already had, not billed.
Record what you find
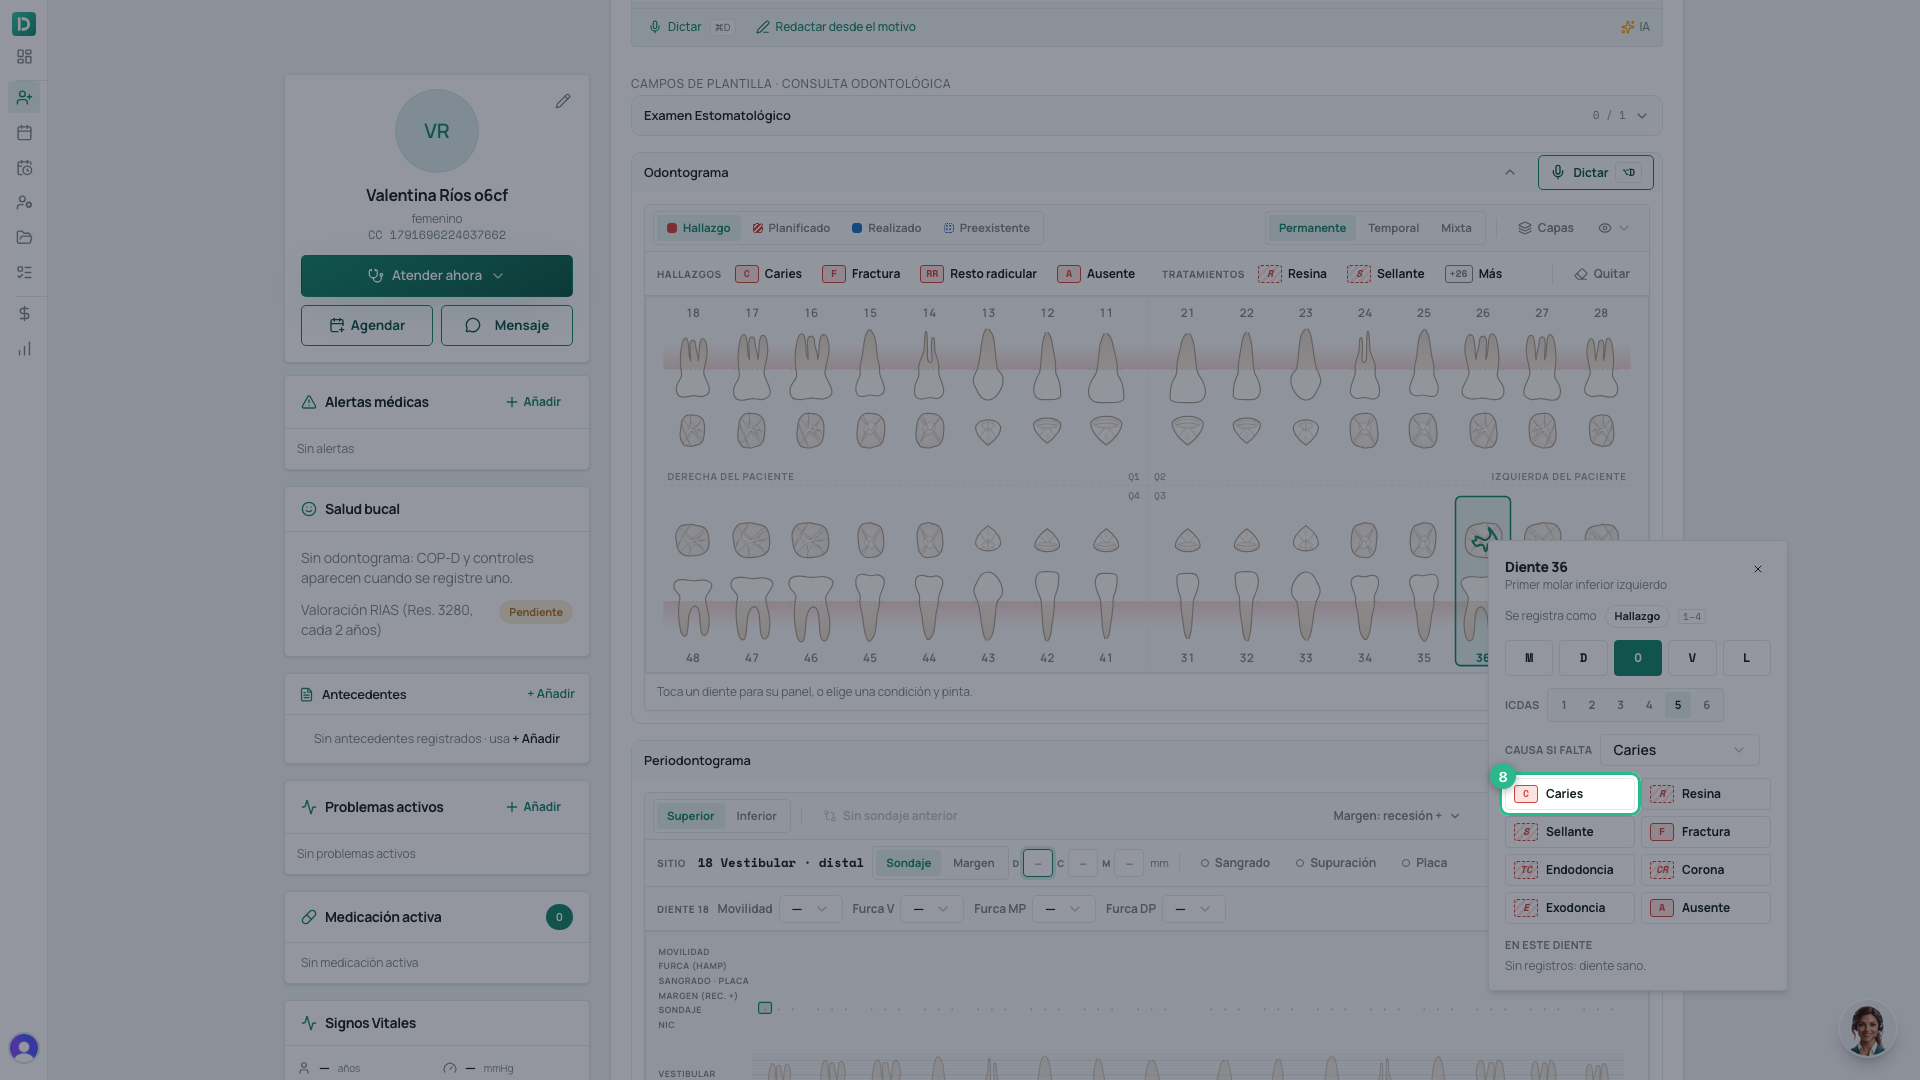
- Tap a tooth surface — here, the occlusal surface of 36. Its panel opens with what is already recorded on it.
- Choose the caries ICDAS code: 1–2 is non-cavitated, 3–6 cavitated. The ICD-10 code (K02.0 or K02.1) comes from it.
- Click Caries. It is recorded as a Hallazgo (finding) on that surface.
Plan from the finding
- Type the tooth number (3 6) and press Enter. DeusRex suggests only the treatments that resolve that tooth’s findings.
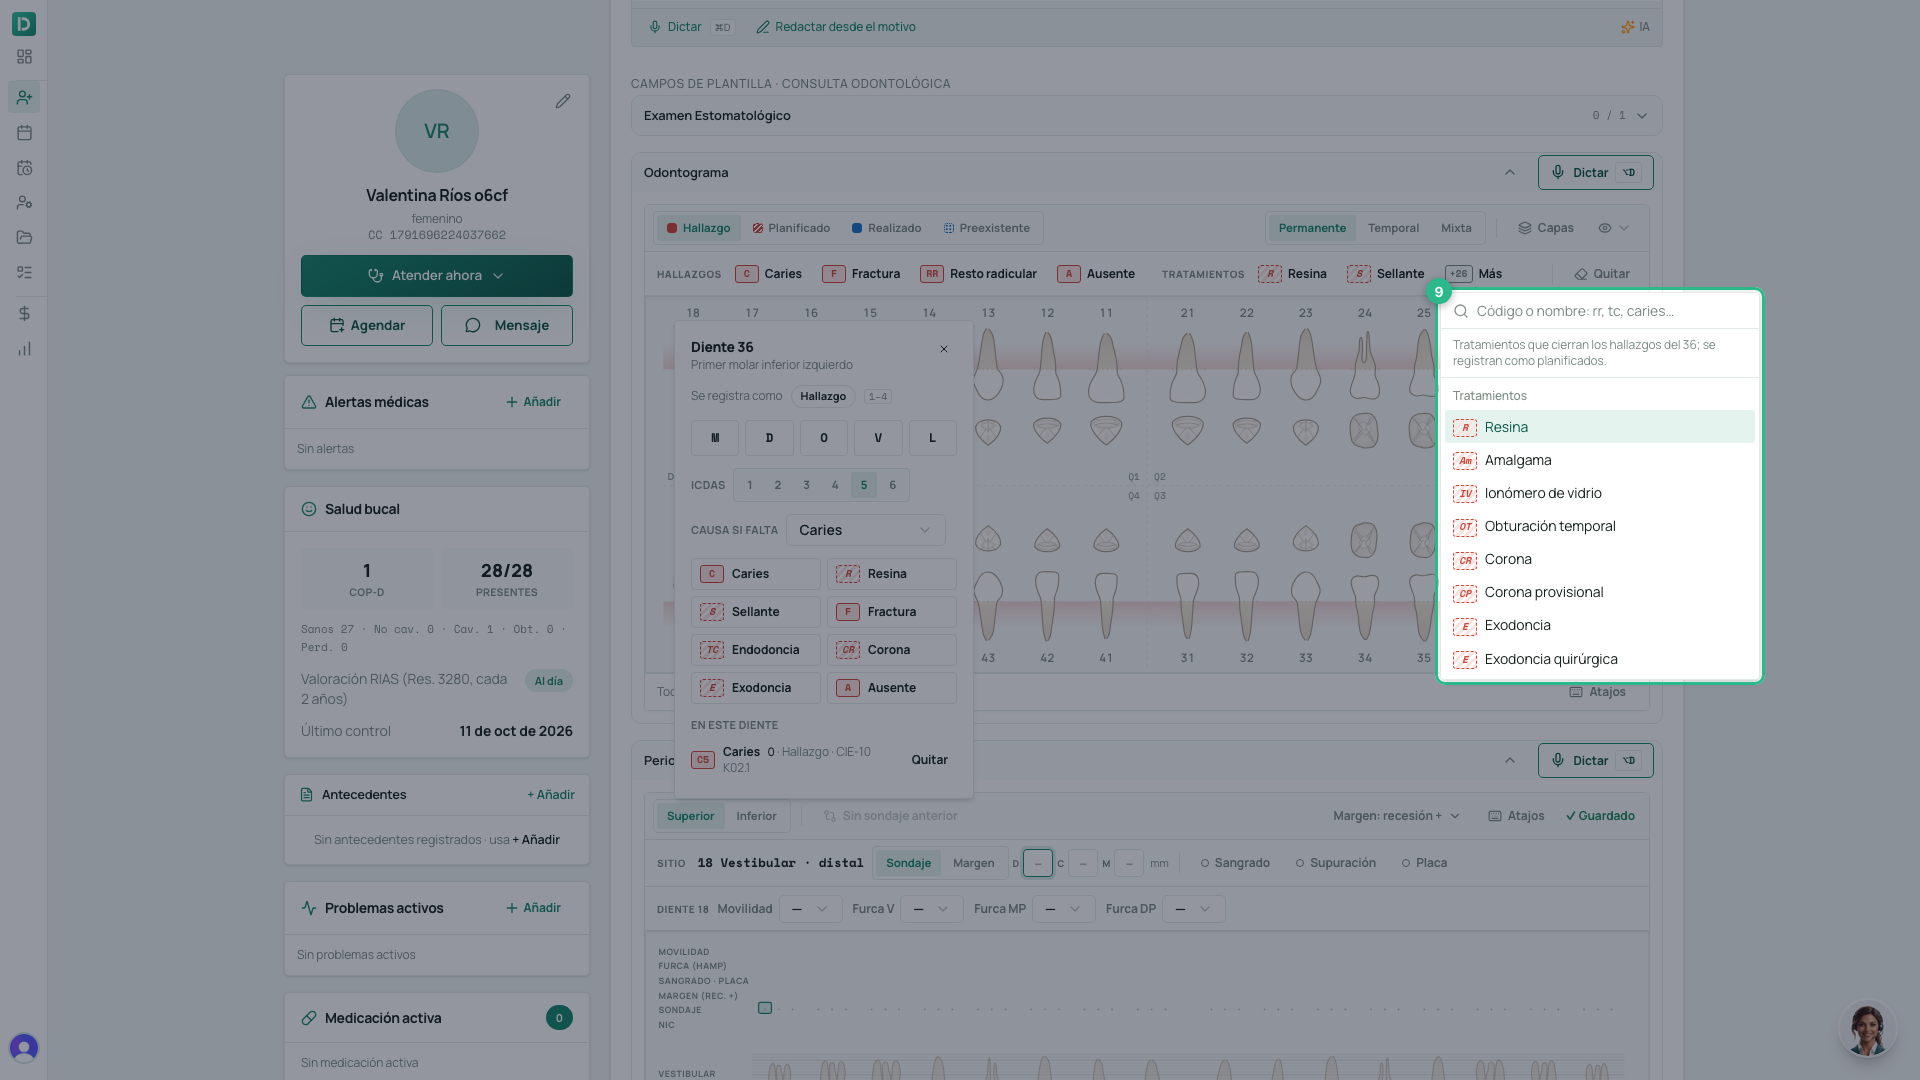
- Choose Resina. It is recorded as Planificada on the same surface, ready for the treatment plan (how).
Record what you do
- In Registrar como, choose Realizado.
- Press Espacio (Space) and type the condition’s code —
ris Resina,tcroot canal,eextraction — or its name. Enter selects it and it becomes your brush.
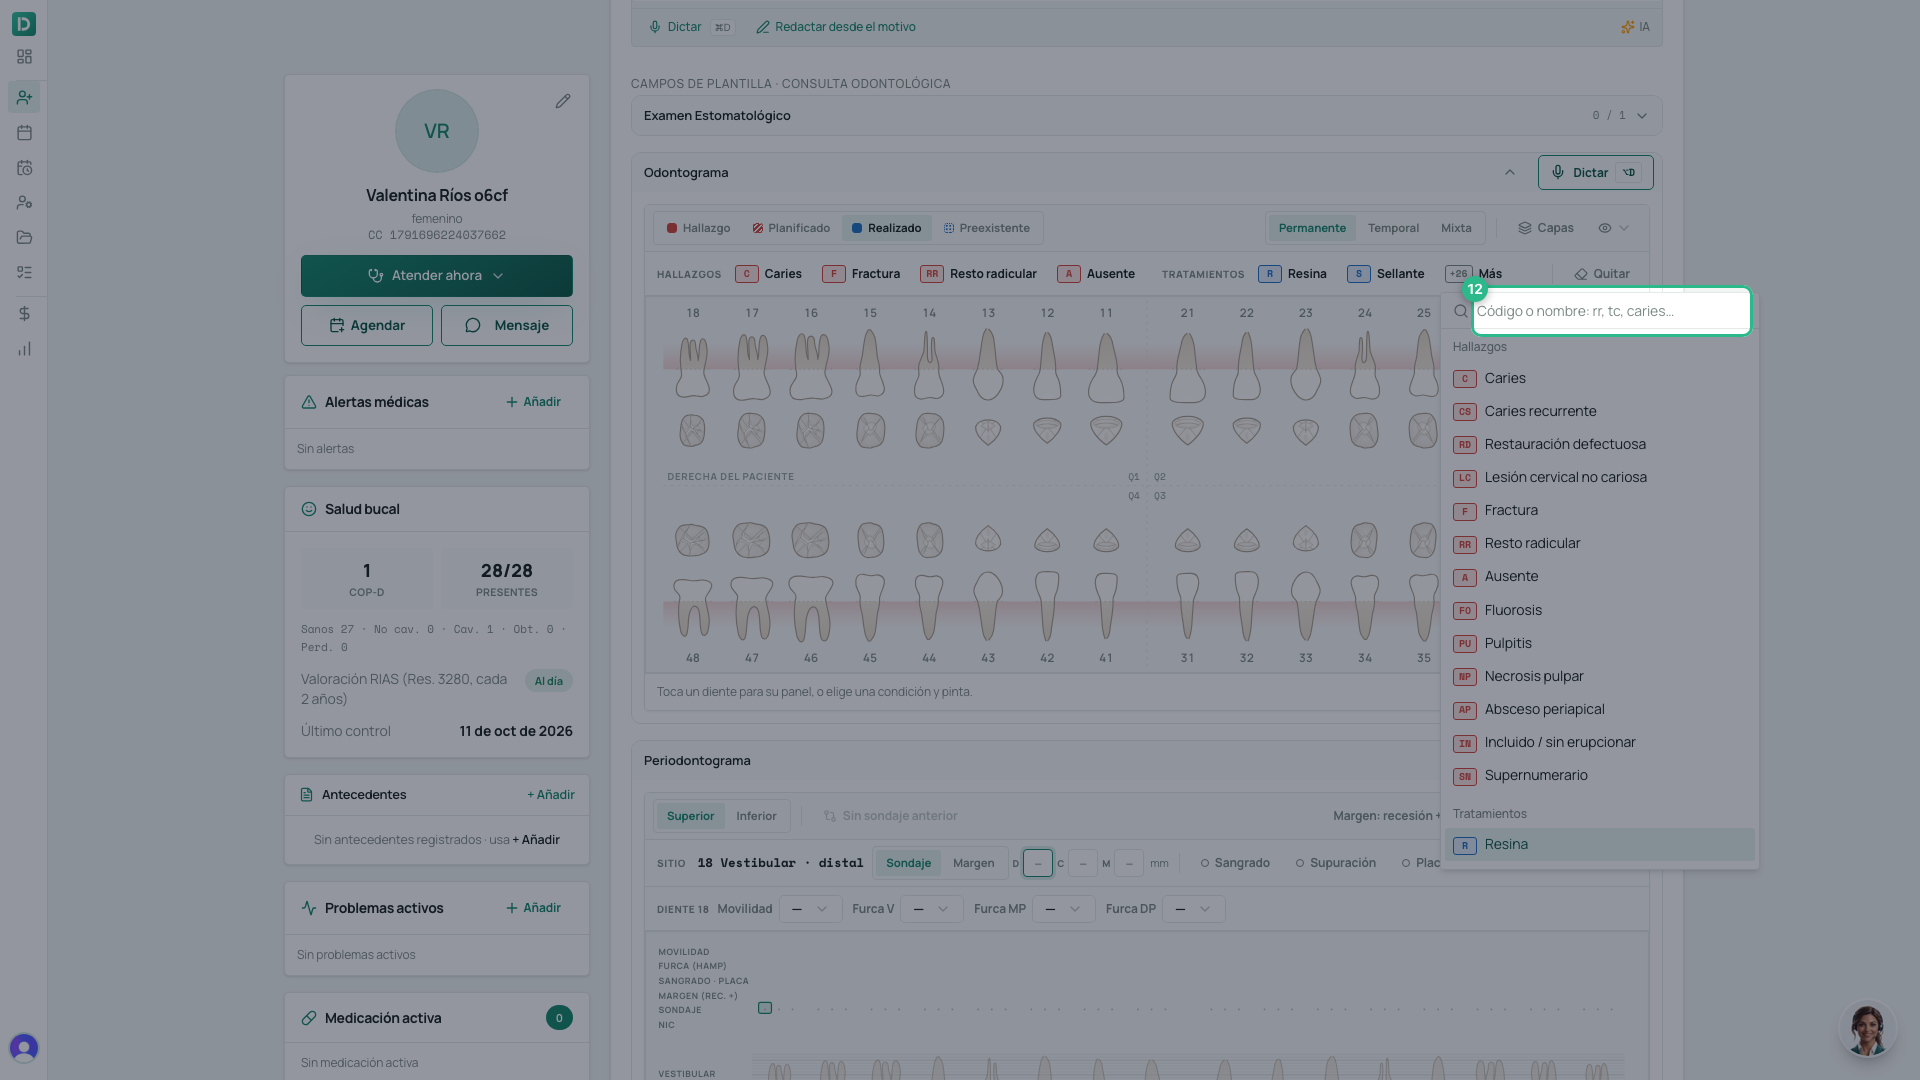
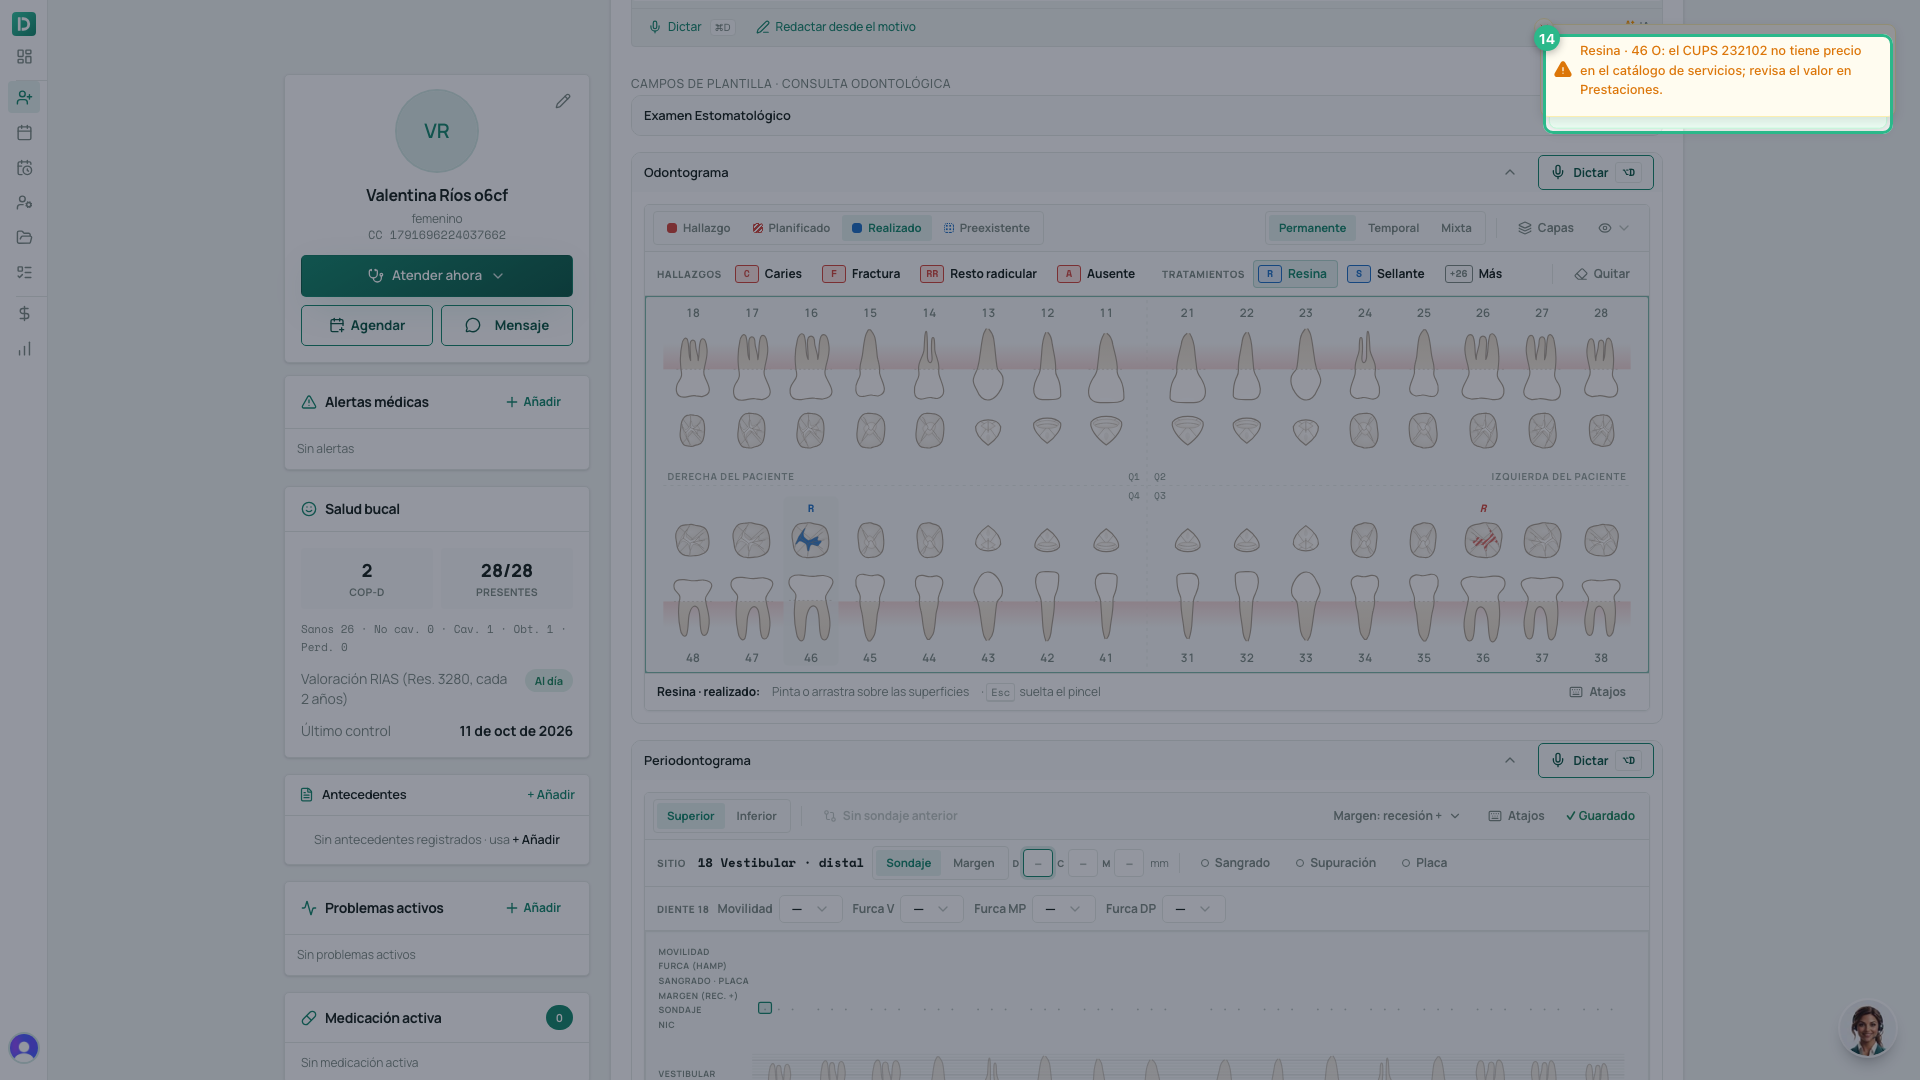
- Tap the treated surface — here, the occlusal surface of 46. You can drag across several surfaces or teeth: they are saved together when you let go.
- A Realizado treatment automatically becomes a prestación of the visit, with its CUPS code and the price from your service catalog. If that CUPS code has no price in the catalog, a notice asks you to check the price in Prestaciones.
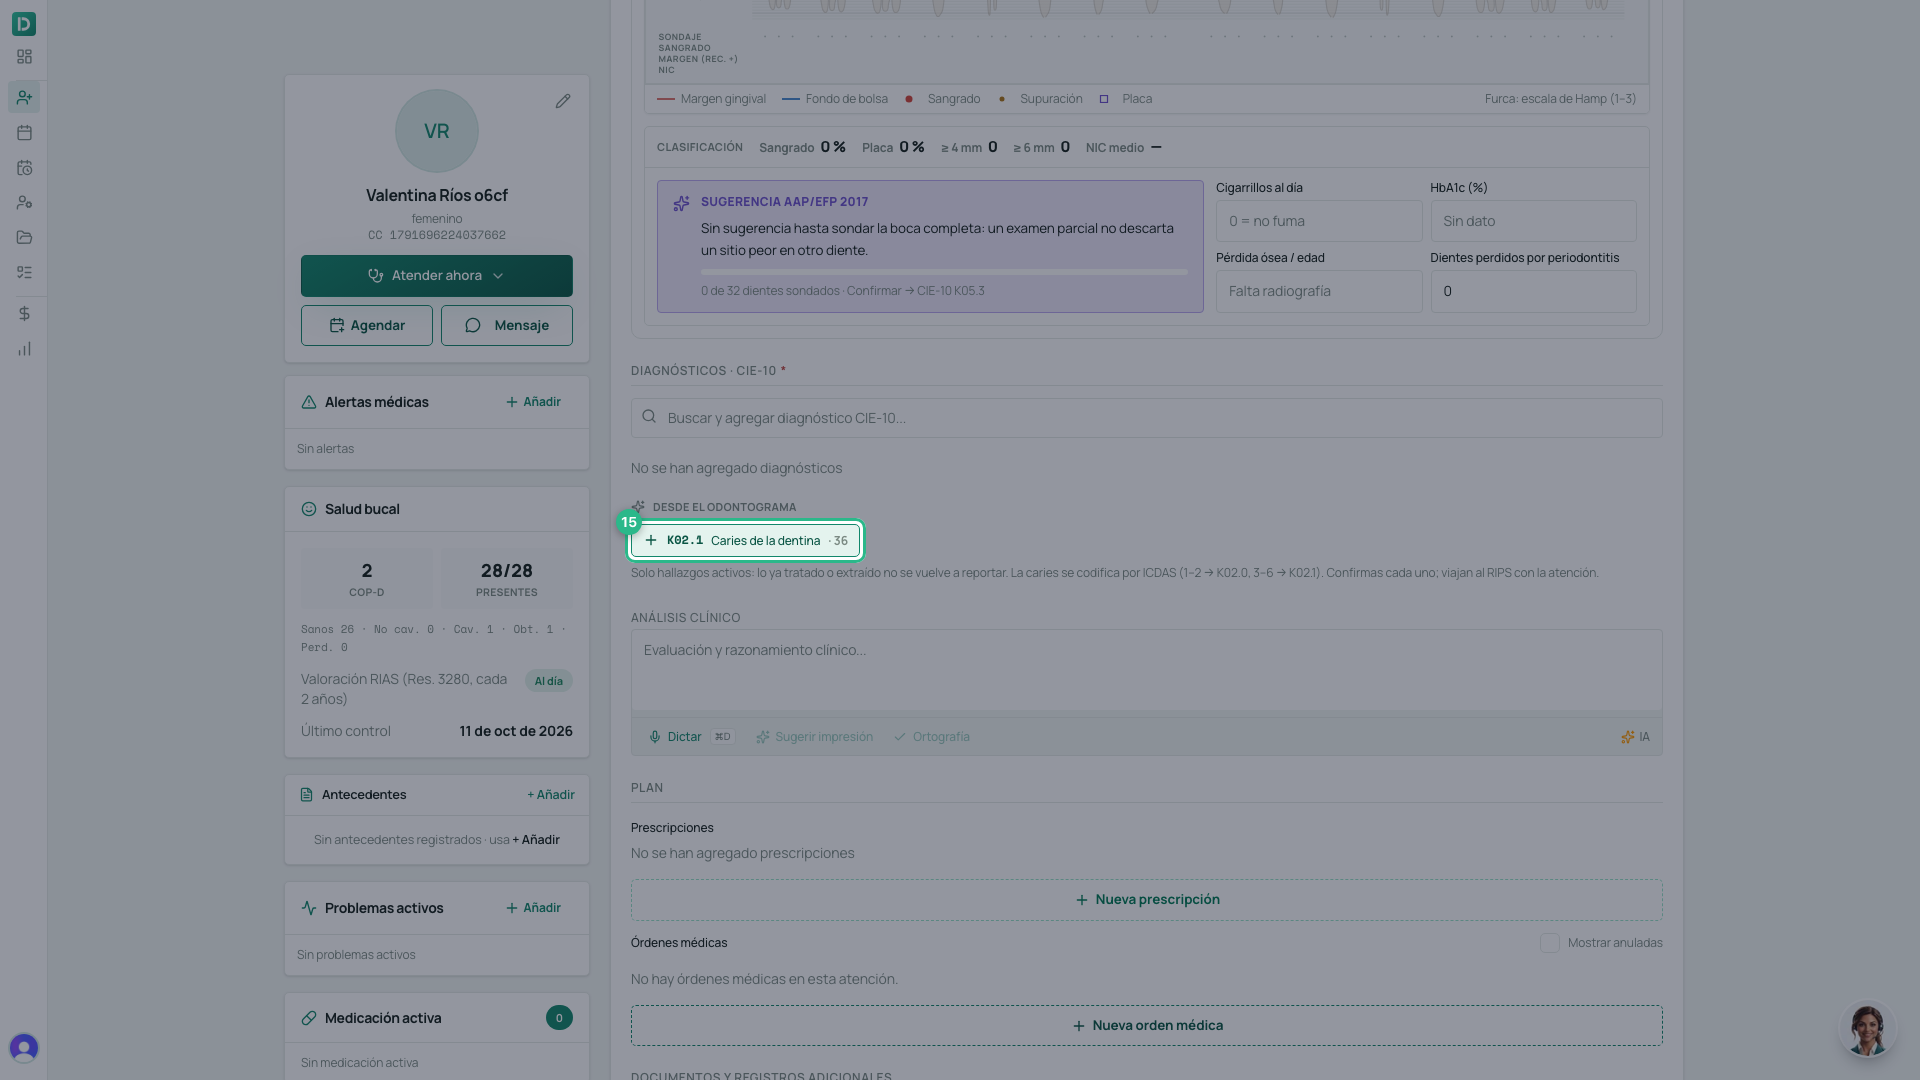
- Under Diagnósticos, the odontogram suggests the ICD-10 code for each active finding. Click the right one: it goes to the RIPS with the visit.
Correct while the visit is open
Until you sign the visit, the odontogram is a draft, like the rest of the consultation: take marks off and chart again as much as you like, without a trace.
- In the conditions bar, click Quitar and tap the mark you don’t want.
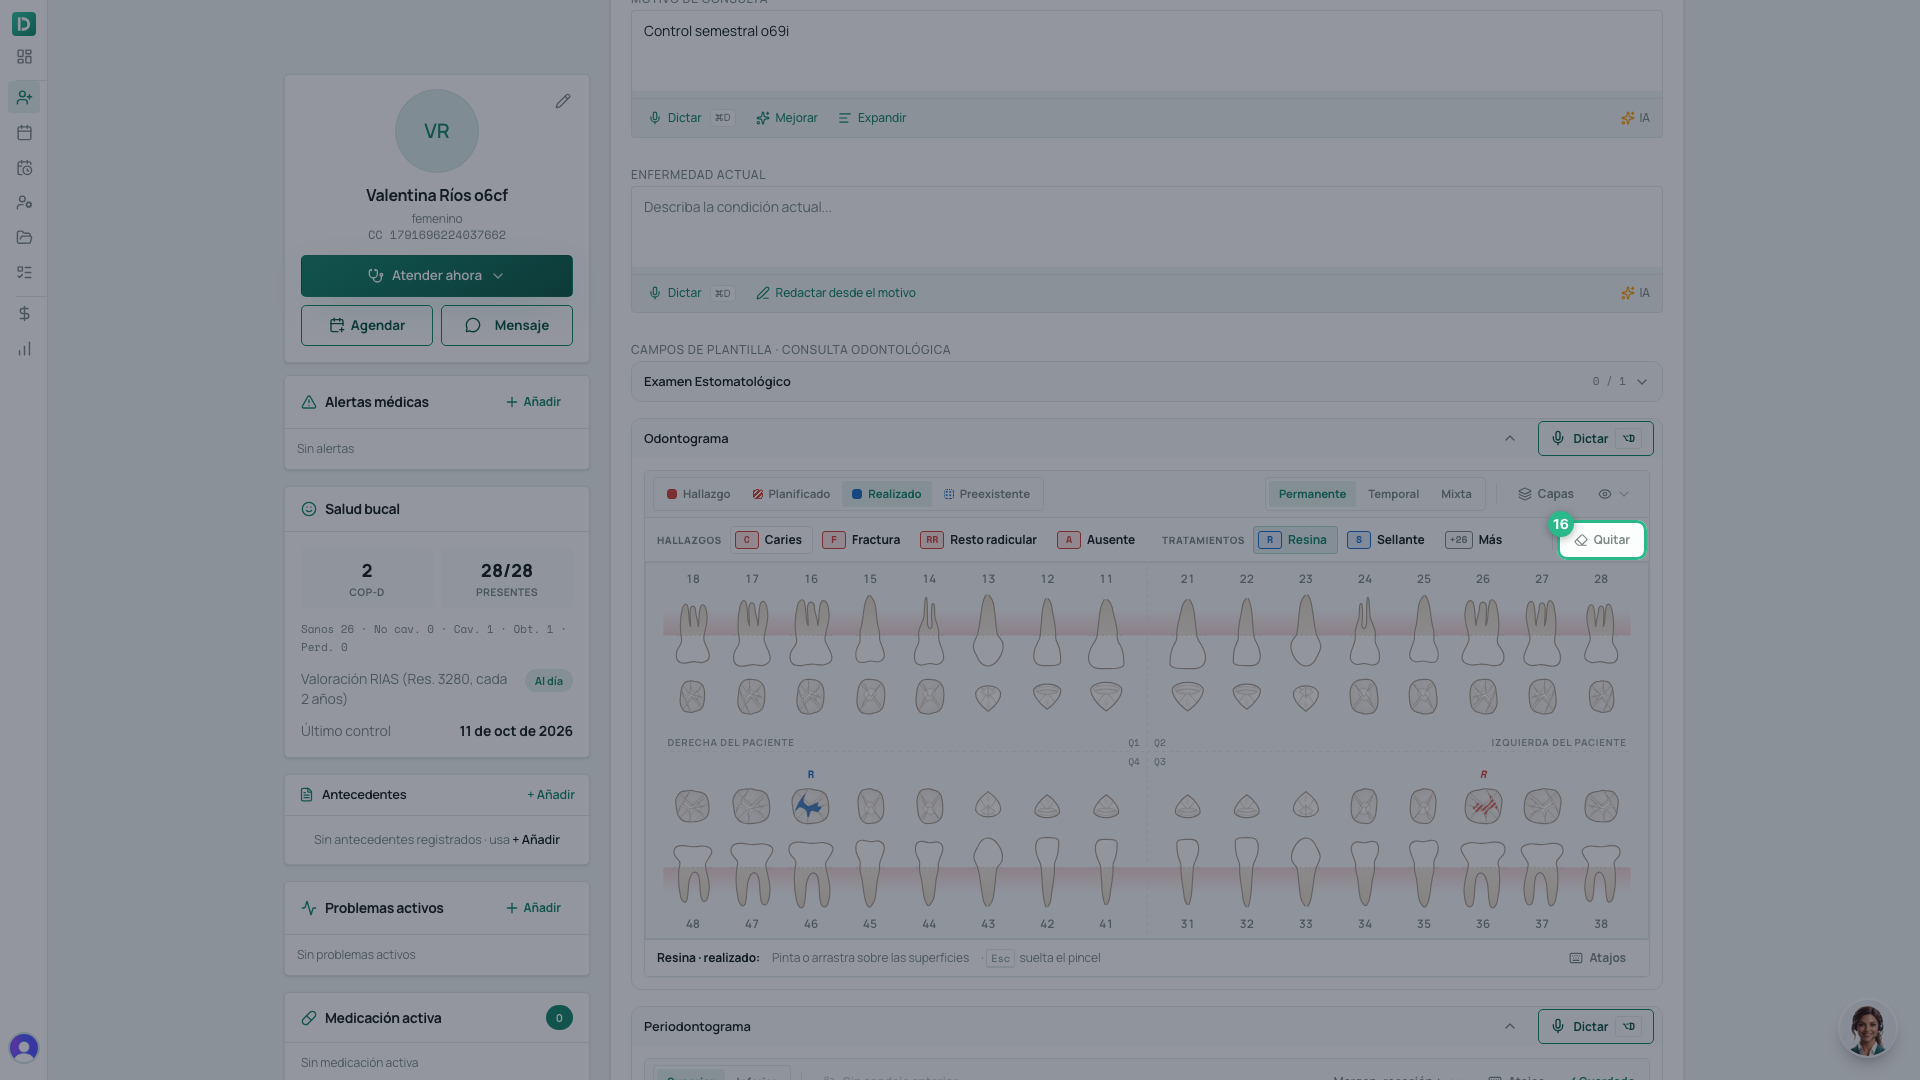
- It is removed at once. If it was a completed treatment, its prestación goes with it — unless it has already been invoiced: then correct the invoice first.
Once you sign, the odontogram is fixed with the visit: the clinical record does not allow alterations (Res. 1995 of 1999). A later correction is recorded as an amendment or in a new visit.
Dictate with the scribe
With the scribe on, you do not need to touch the tooth: you say «treinta y seis, caries oclusal, ICDAS cuatro» (36, occlusal caries, ICDAS 4) and the mark appears on 36, with Deshacer (undo) in the scribe’s panel.
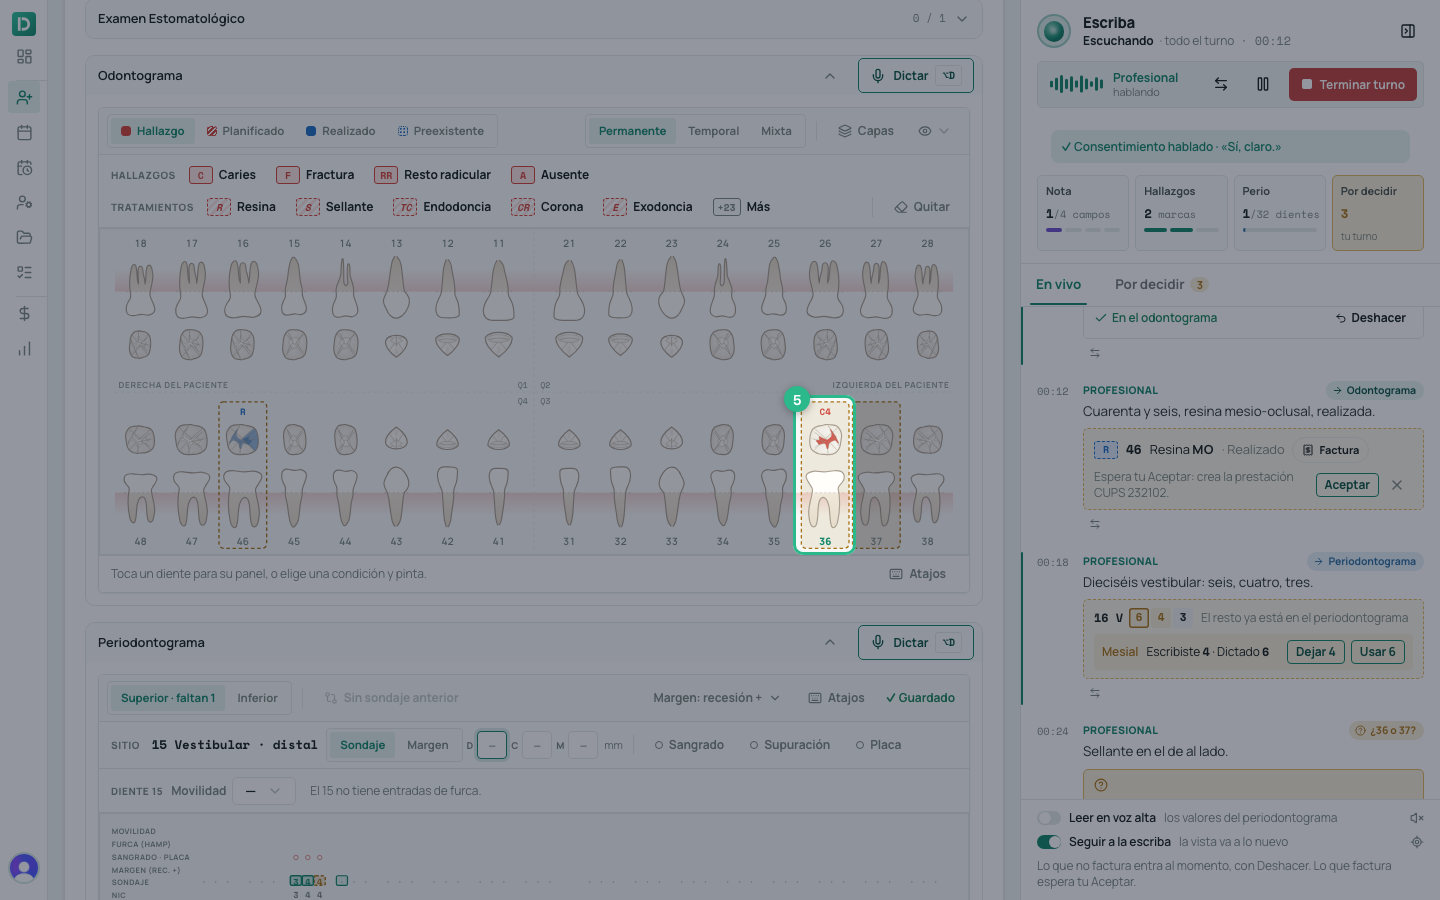
- Findings and plans go in at once.
- Completed work stays dotted on the tooth until you click Aceptar: that is when the prestación is created, just as if you had charted it.
- If the scribe does not know which tooth you mean, it outlines the candidates and asks you. It marks nothing until you choose.
- «Borra eso» (delete that) or «no, el treinta y siete» (no, 37) correct the last mark, or one that was already on the odontogram.
- Dictar in the section header (or ⌥D) focuses the scribe on the odontogram; without the scribe, it dictates only into this section.
When you click Aplicar y cerrar el turno, whatever you did not accept or answer does not stay drawn: it appears in the summary as Sin decidir · no quedó en la atención. How to start listening and close the appointment is in How to dictate and use the AI scribe.
Keyboard shortcuts
With the odontogram focused, click Atajos at the bottom to see them all:
| Key | What it does |
|---|---|
Two digits (3 6) | Go to the tooth |
M O D V L | Surface of the selected tooth |
1 to 4 | Finding, planned, completed, pre-existing |
| Space | Search for a condition by code or name |
| Enter | Plan a treatment for the tooth’s finding |
| Esc | Drop the brush or close the panel |
Tip
Record as Preexistente what the patient already brings from another clinic (a crown, a root canal). That way the odontogram shows the whole mouth, the COP-D index counts correctly and you do not bill for what you did not do.
The visit’s X-rays are uploaded in Imágenes y documentos, in the same consultation, and tagged with their teeth so they appear on each tooth’s sheet (how).