How to create a patient
On this page
A patient is the person you attend. Their record stores contact details, affiliation and their entire medical history.
Steps
-
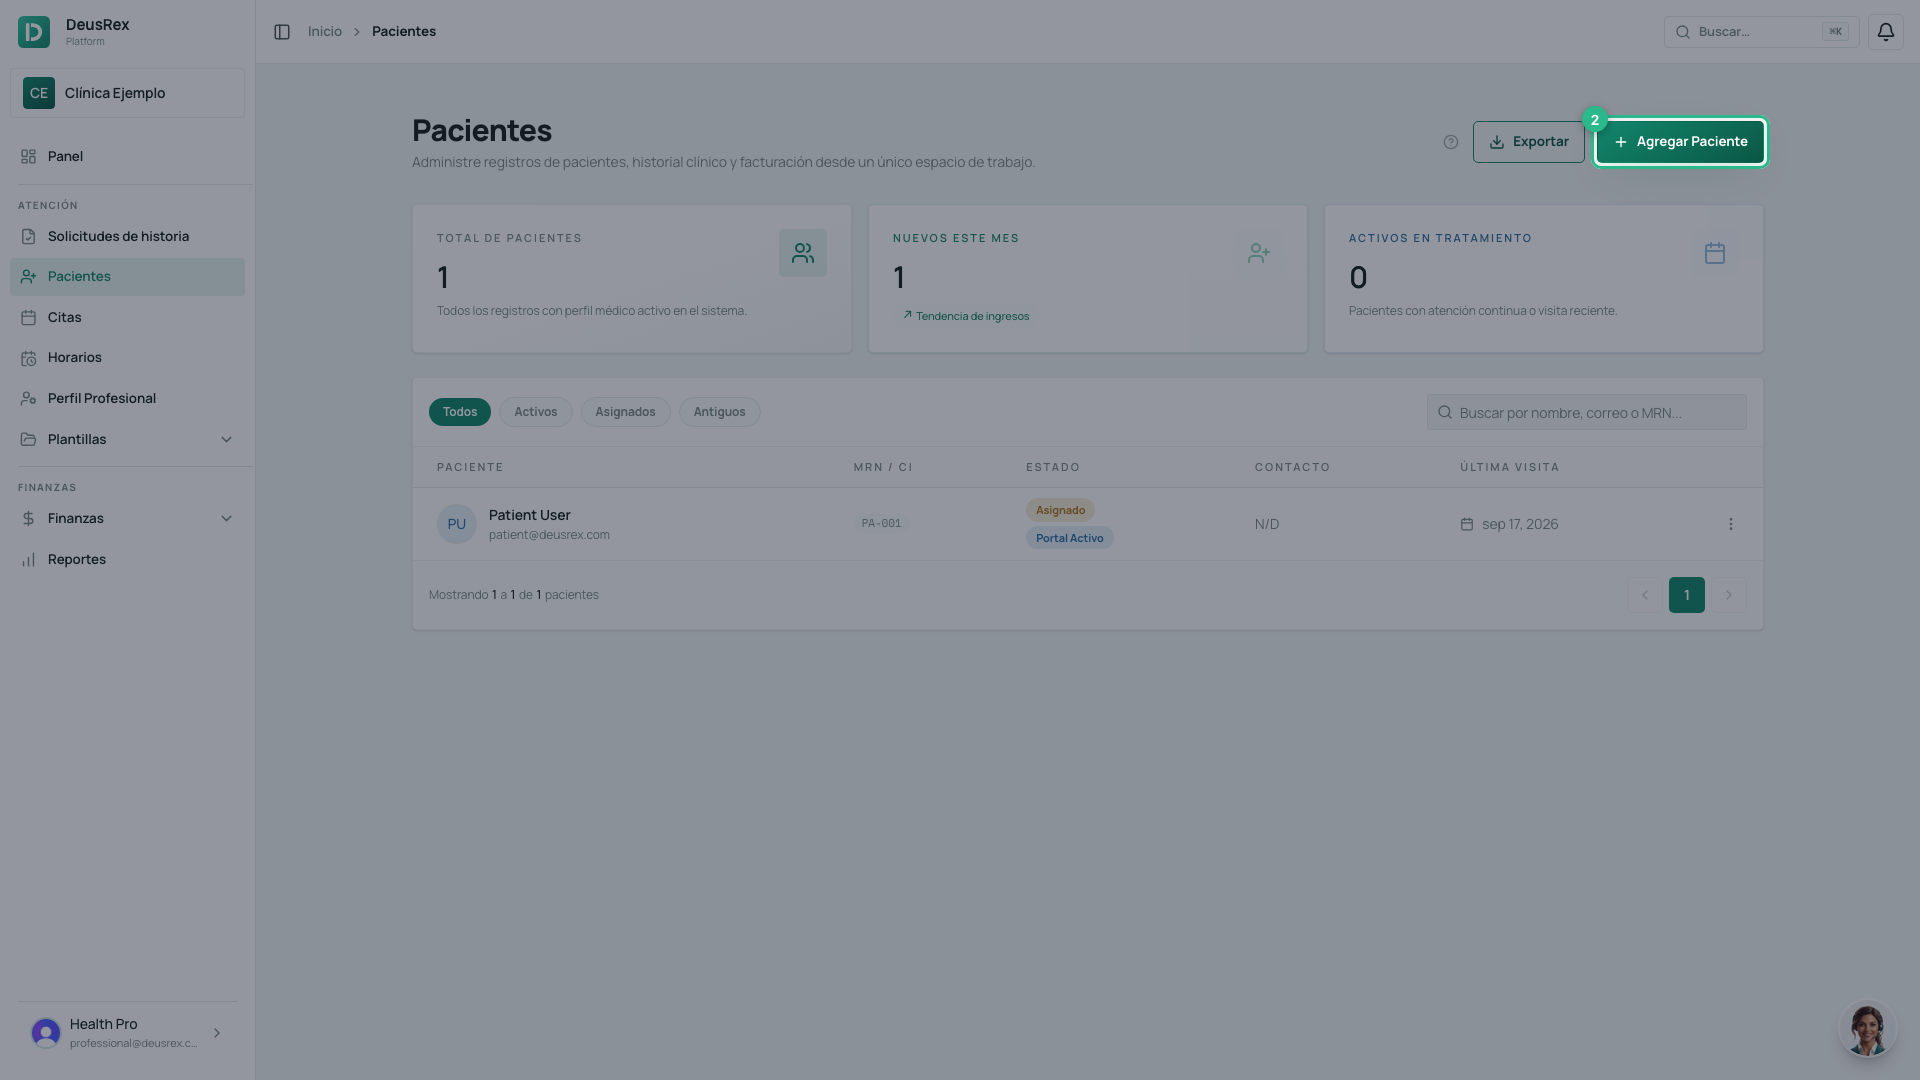
Open Patients in the sidebar.
-
Tap Nuevo Paciente.
-
Choose the Tipo de Documento and type the Número de Documento.
-
Type the Nombres and the Apellidos.
-
Add the email and the phone.
-
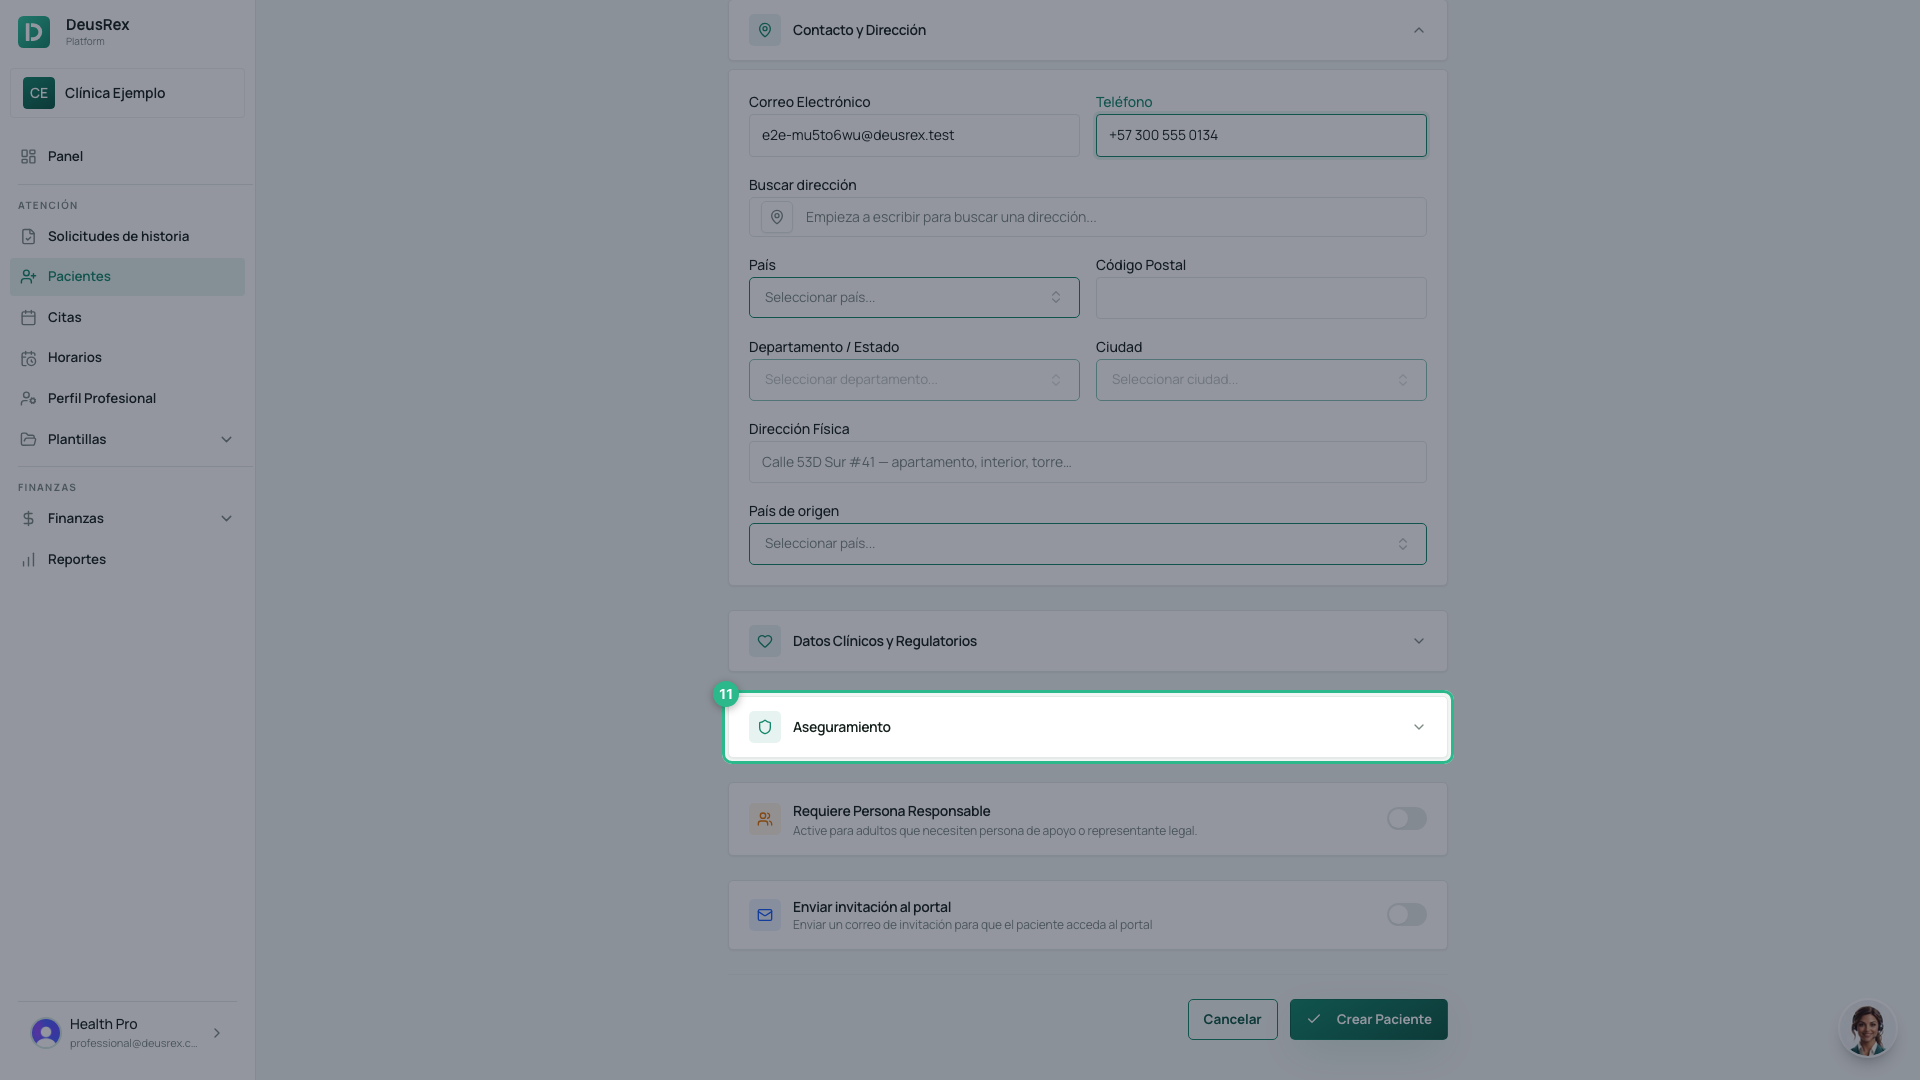
Tap Aseguramiento to open that section. It starts collapsed, so the health plan is not on screen until you open it.
-
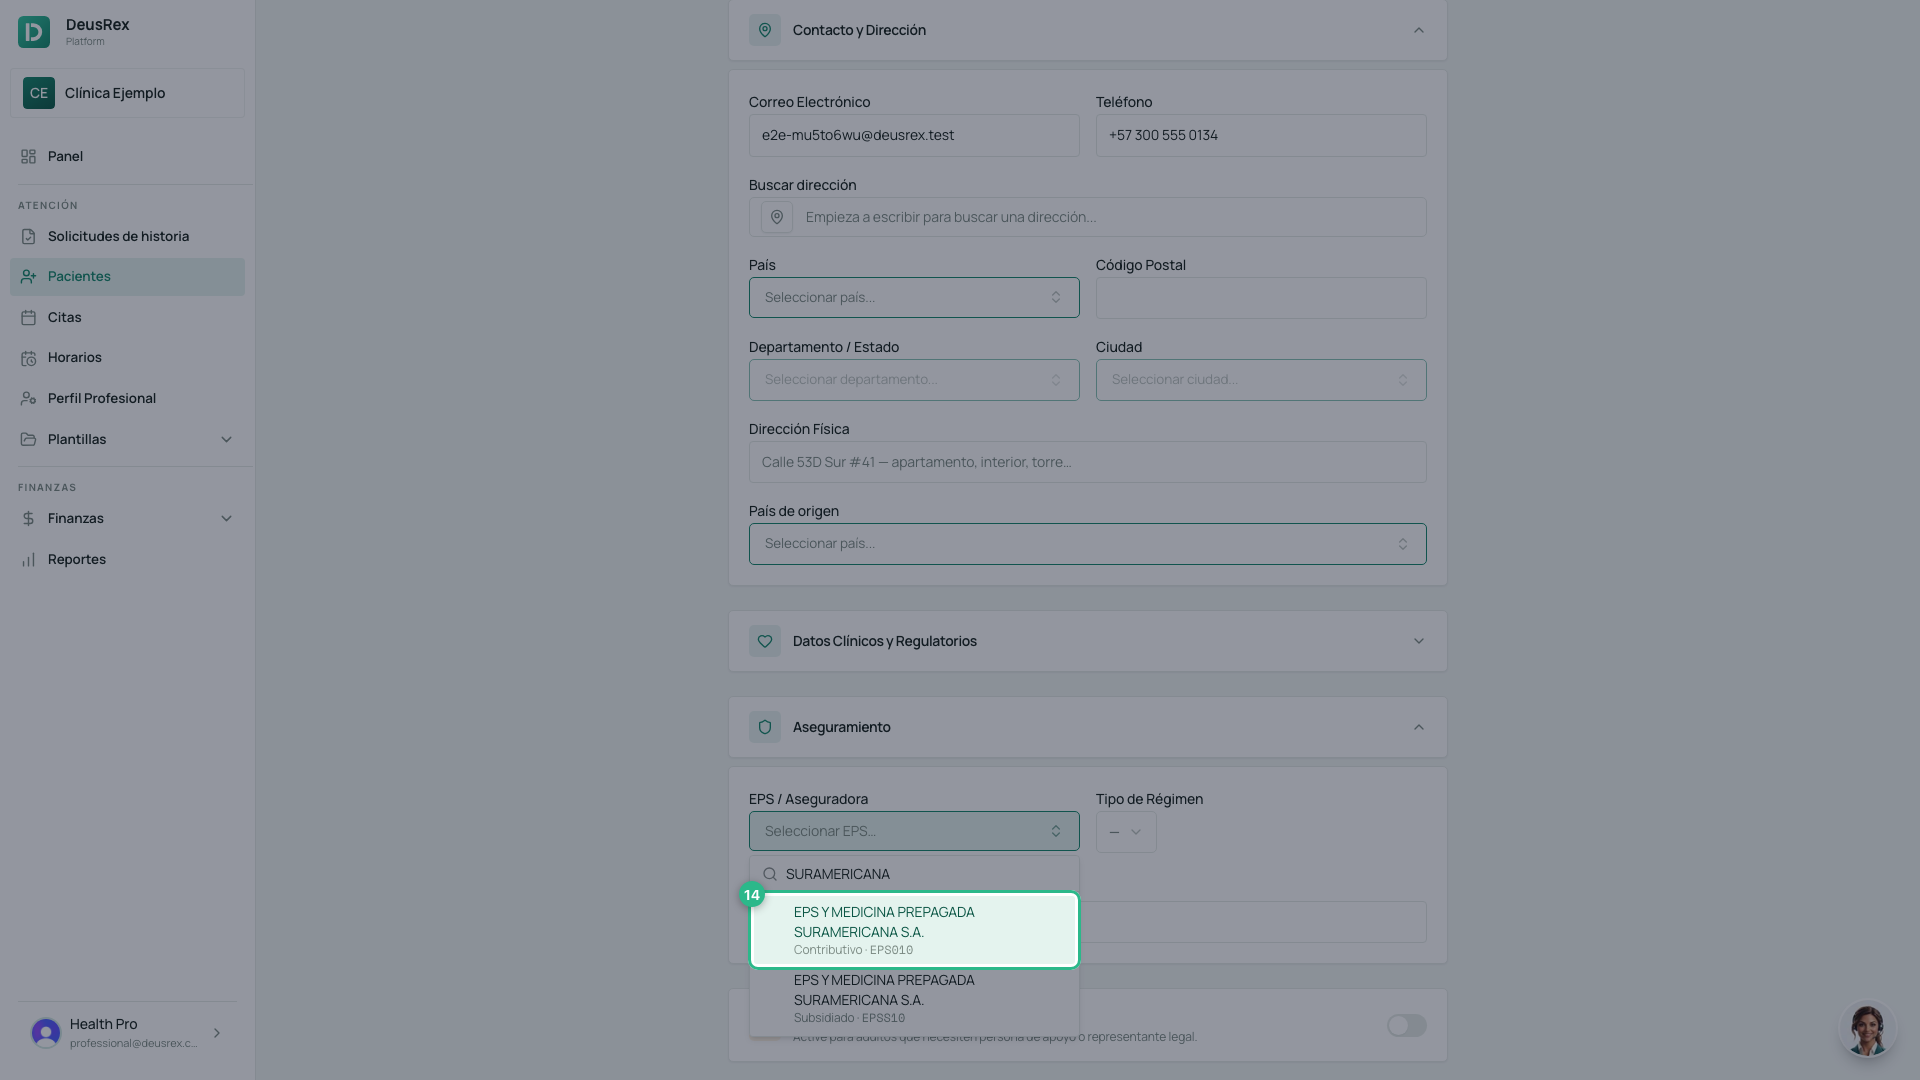
Open EPS / Aseguradora, type part of the name, the code or the NIT and pick the EPS from the list. It is a search over SISPRO’s official catalogue, not a free-text box. An EPS that serves both regimes appears twice: each row shows its own (Contributivo or Subsidiado) and its code.
-
Choose the Tipo de Régimen. The options are the RIPS ones: Contributivo cotizante, Contributivo beneficiario, Subsidiado, and the rest.
-
Tap Crear Paciente.
What is required
Only four fields: Tipo de Documento, Número de Documento, Nombres and Apellidos. Everything else you can fill in later from the patient’s profile.
Tip
You can also create a patient on the fly while scheduling an appointment, without leaving the calendar.