How to add a diagnosis (ICD-10)
The diagnosis is recorded with the ICD-10 standard. It is required before you can close the consultation, and it feeds the RIPS reports and the billing.
Before you start
You need an open consultation. The section looks blocked while the consultation does not exist yet — see the new consultation guide.
Steps
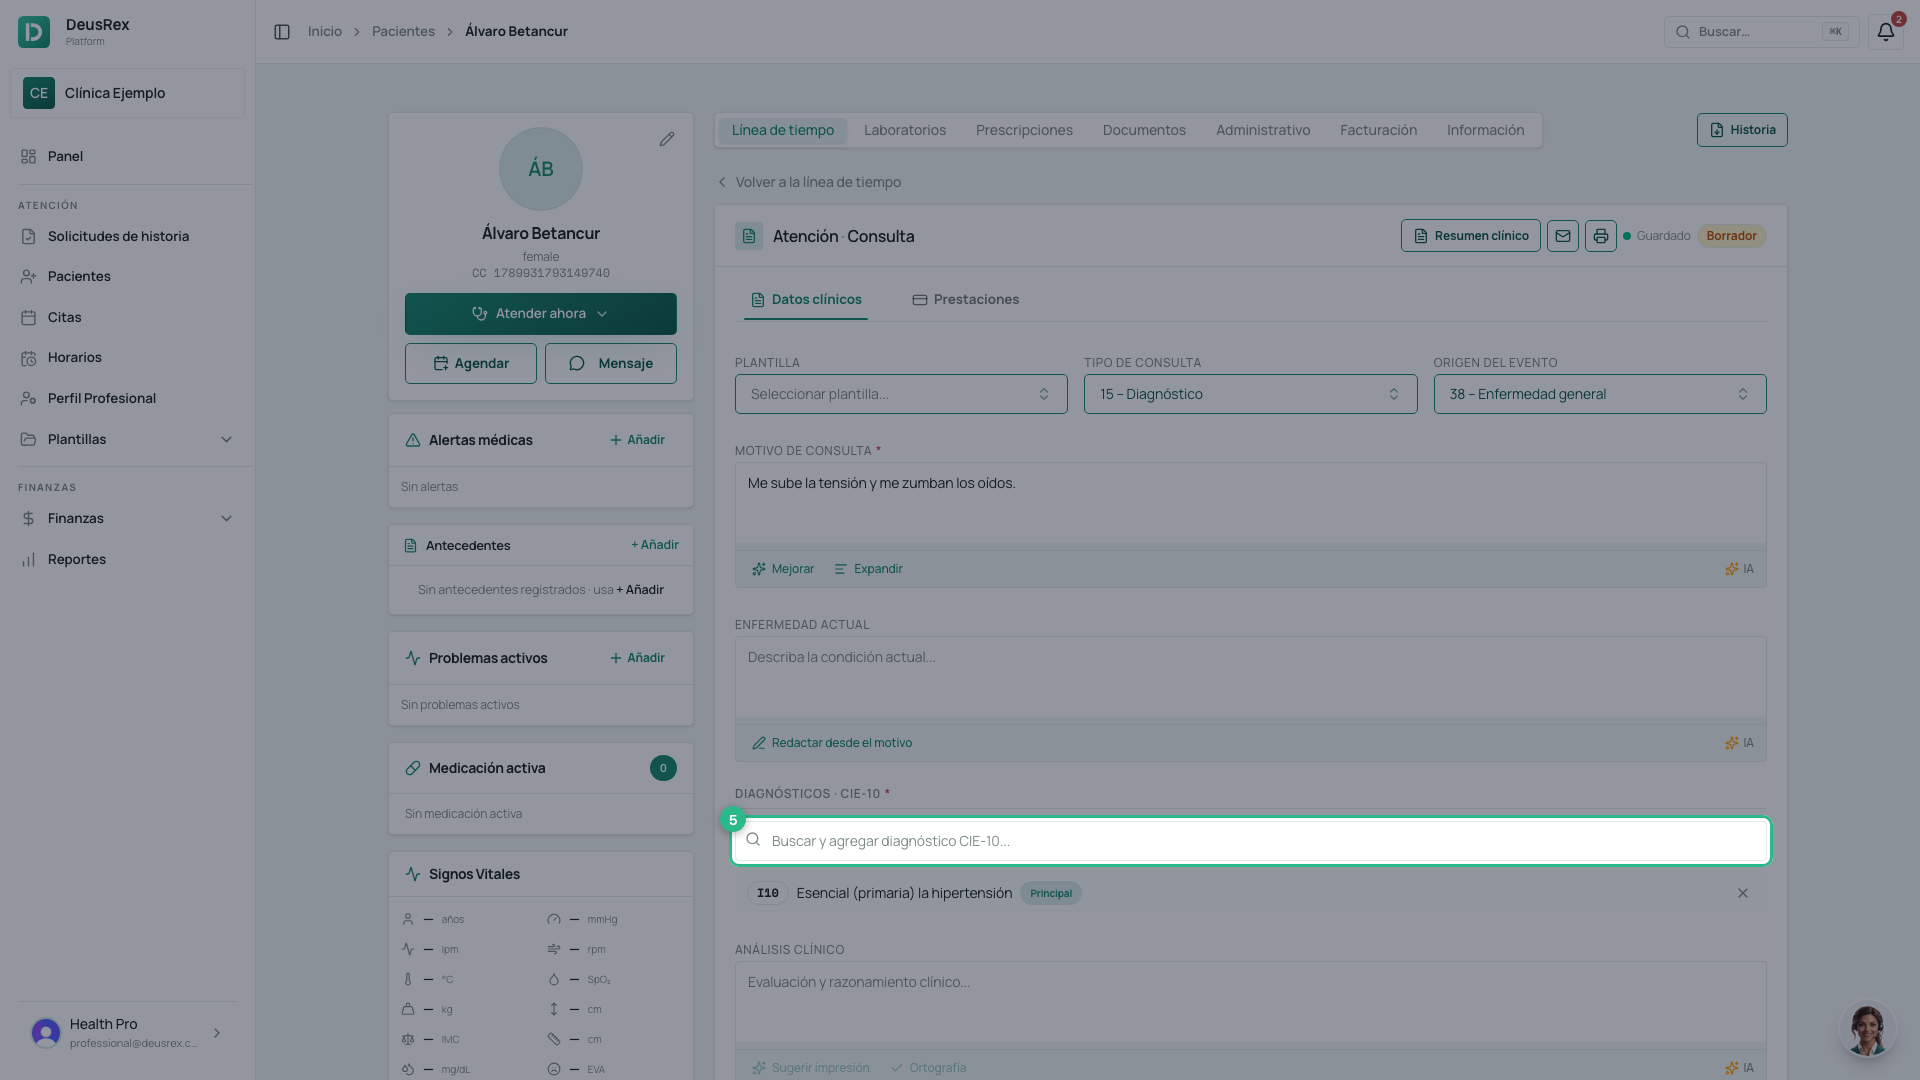
- Inside the consultation, scroll down to the Diagnósticos section.
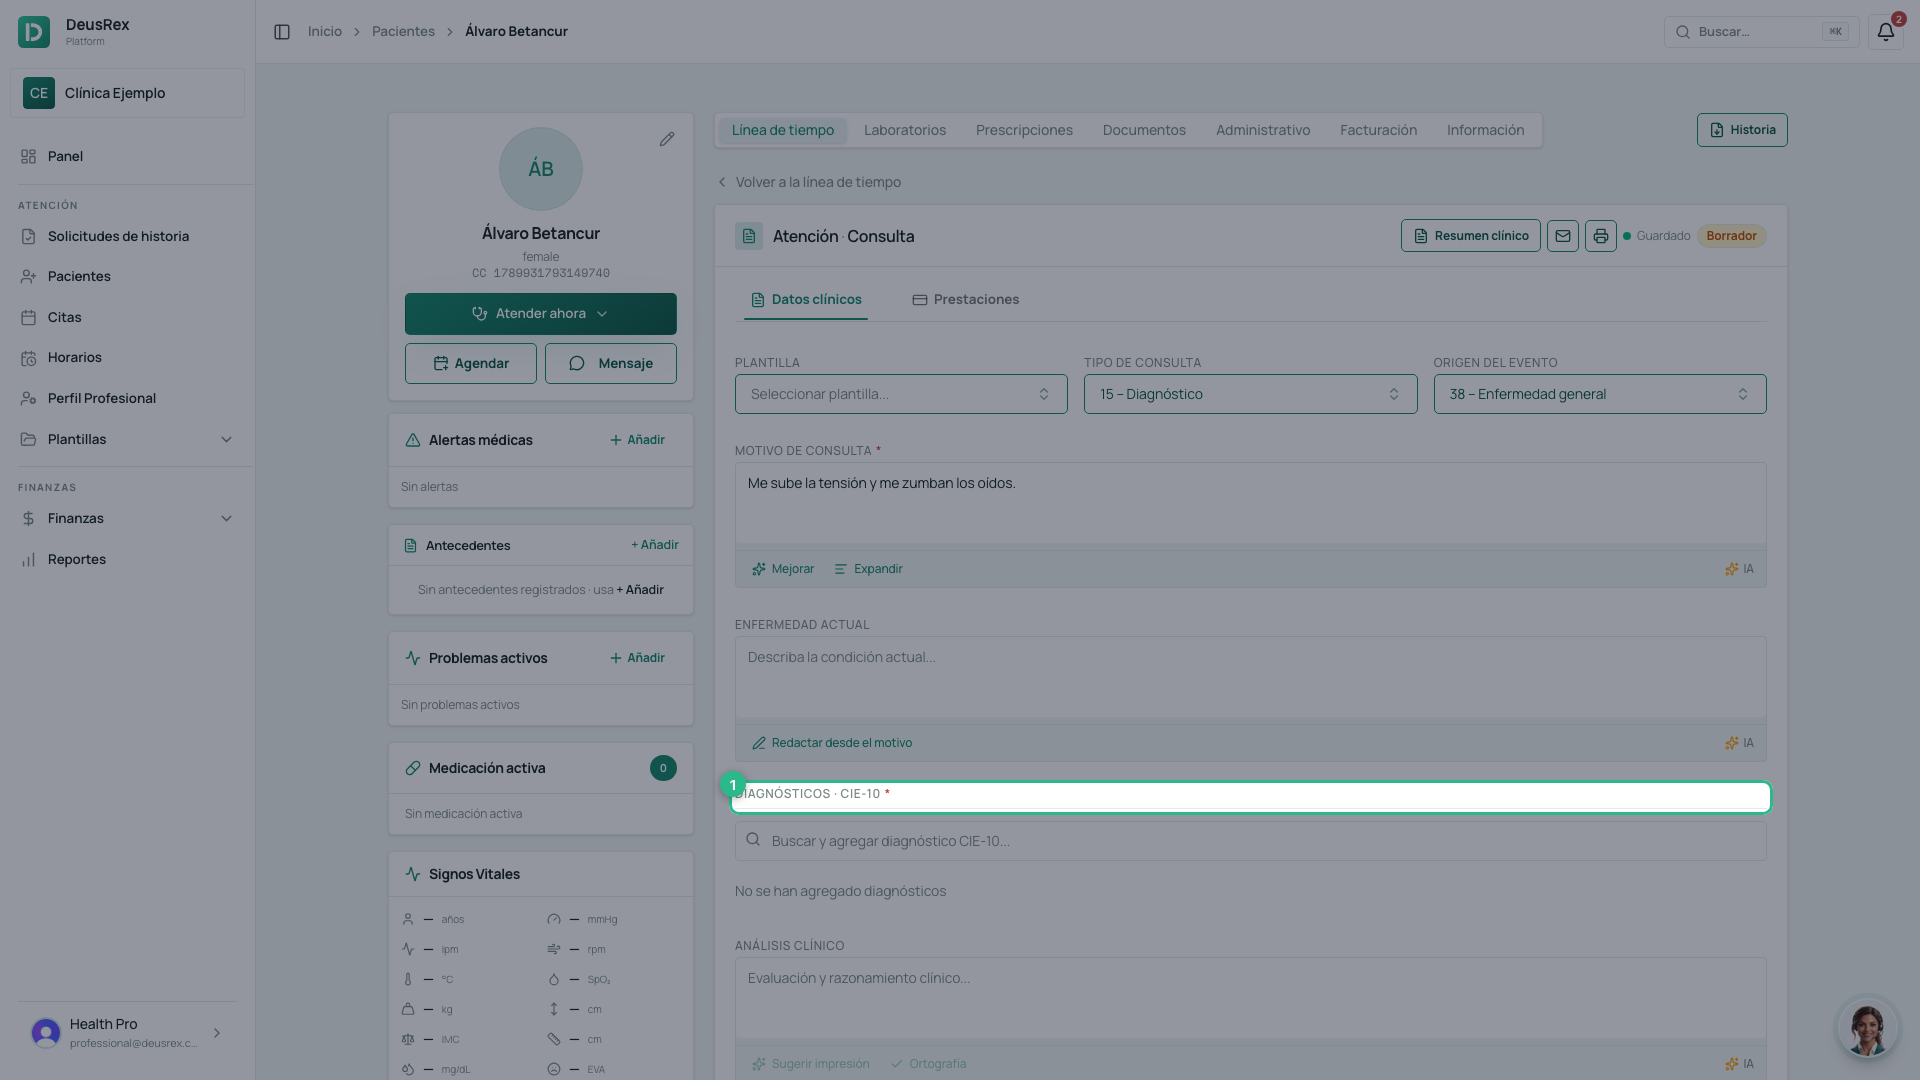
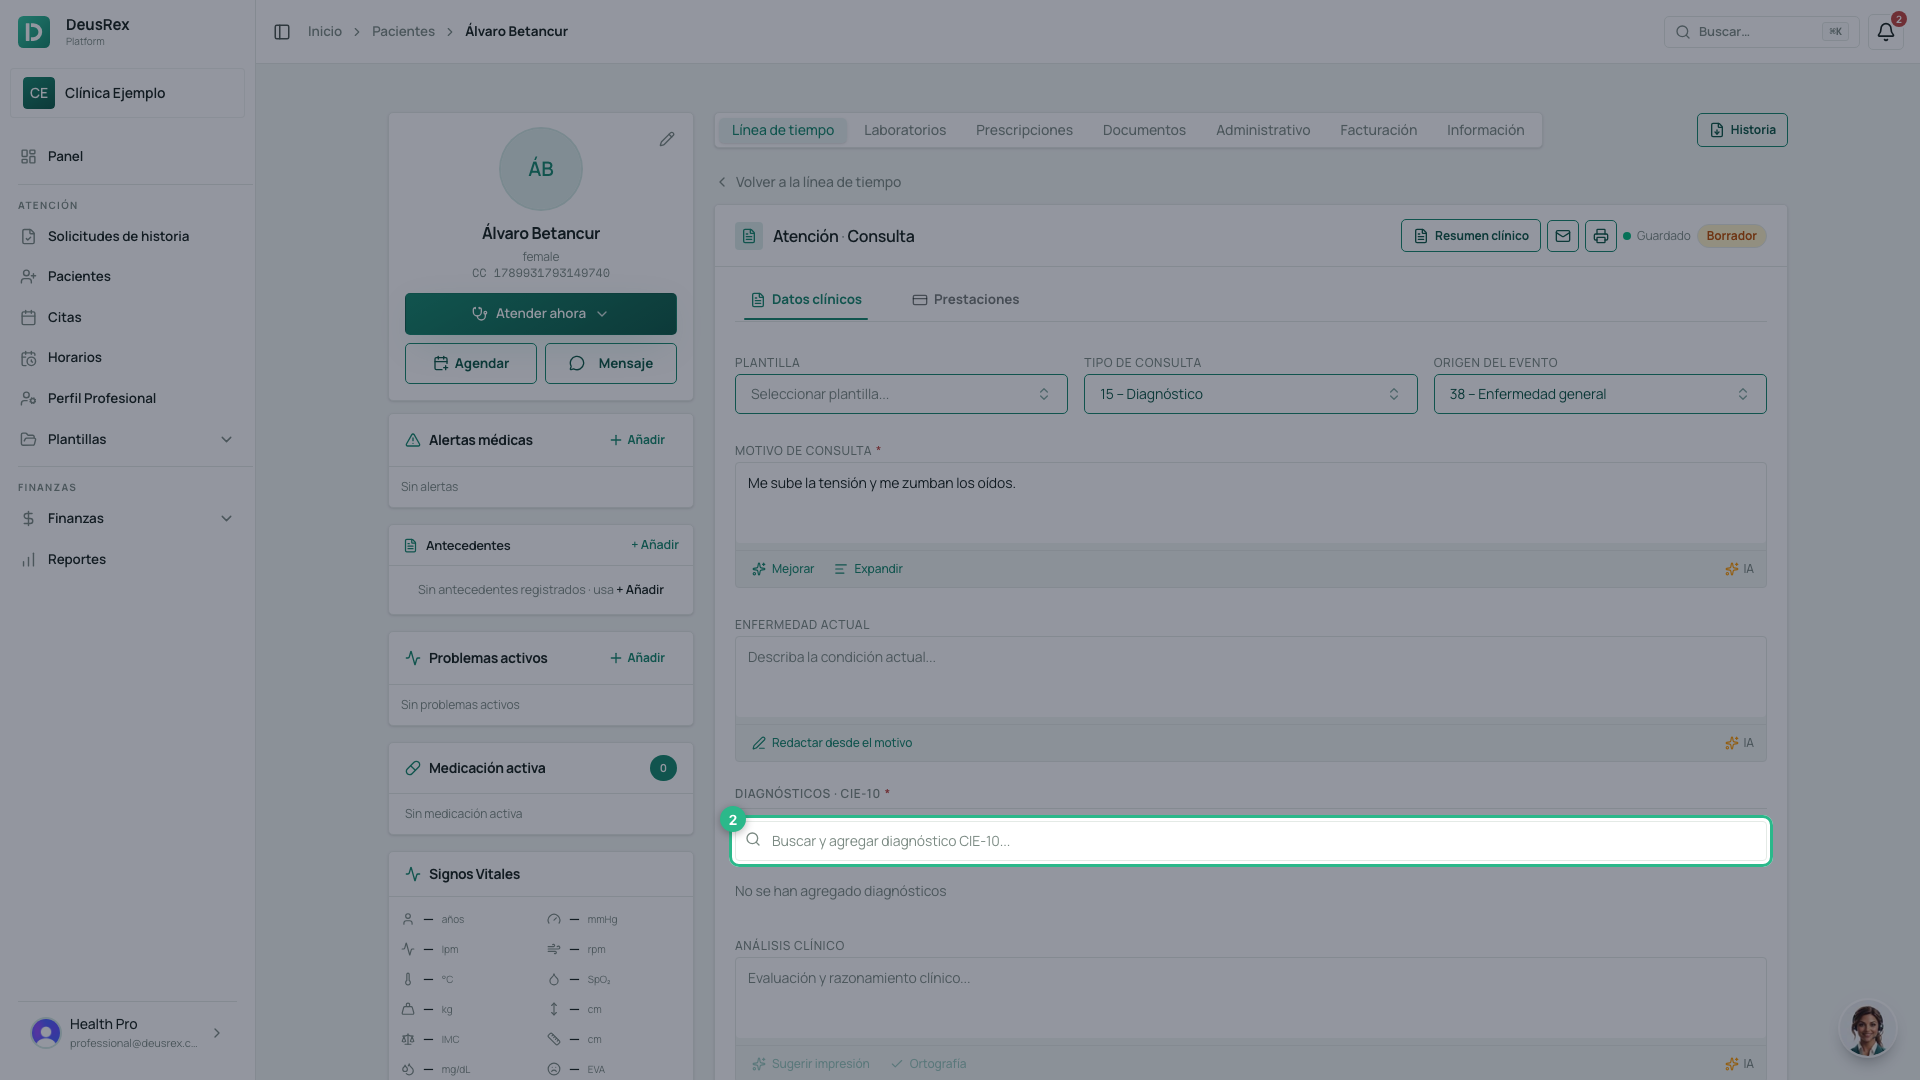
- Type the name of the condition — «hipertensión», for example — or the code itself.
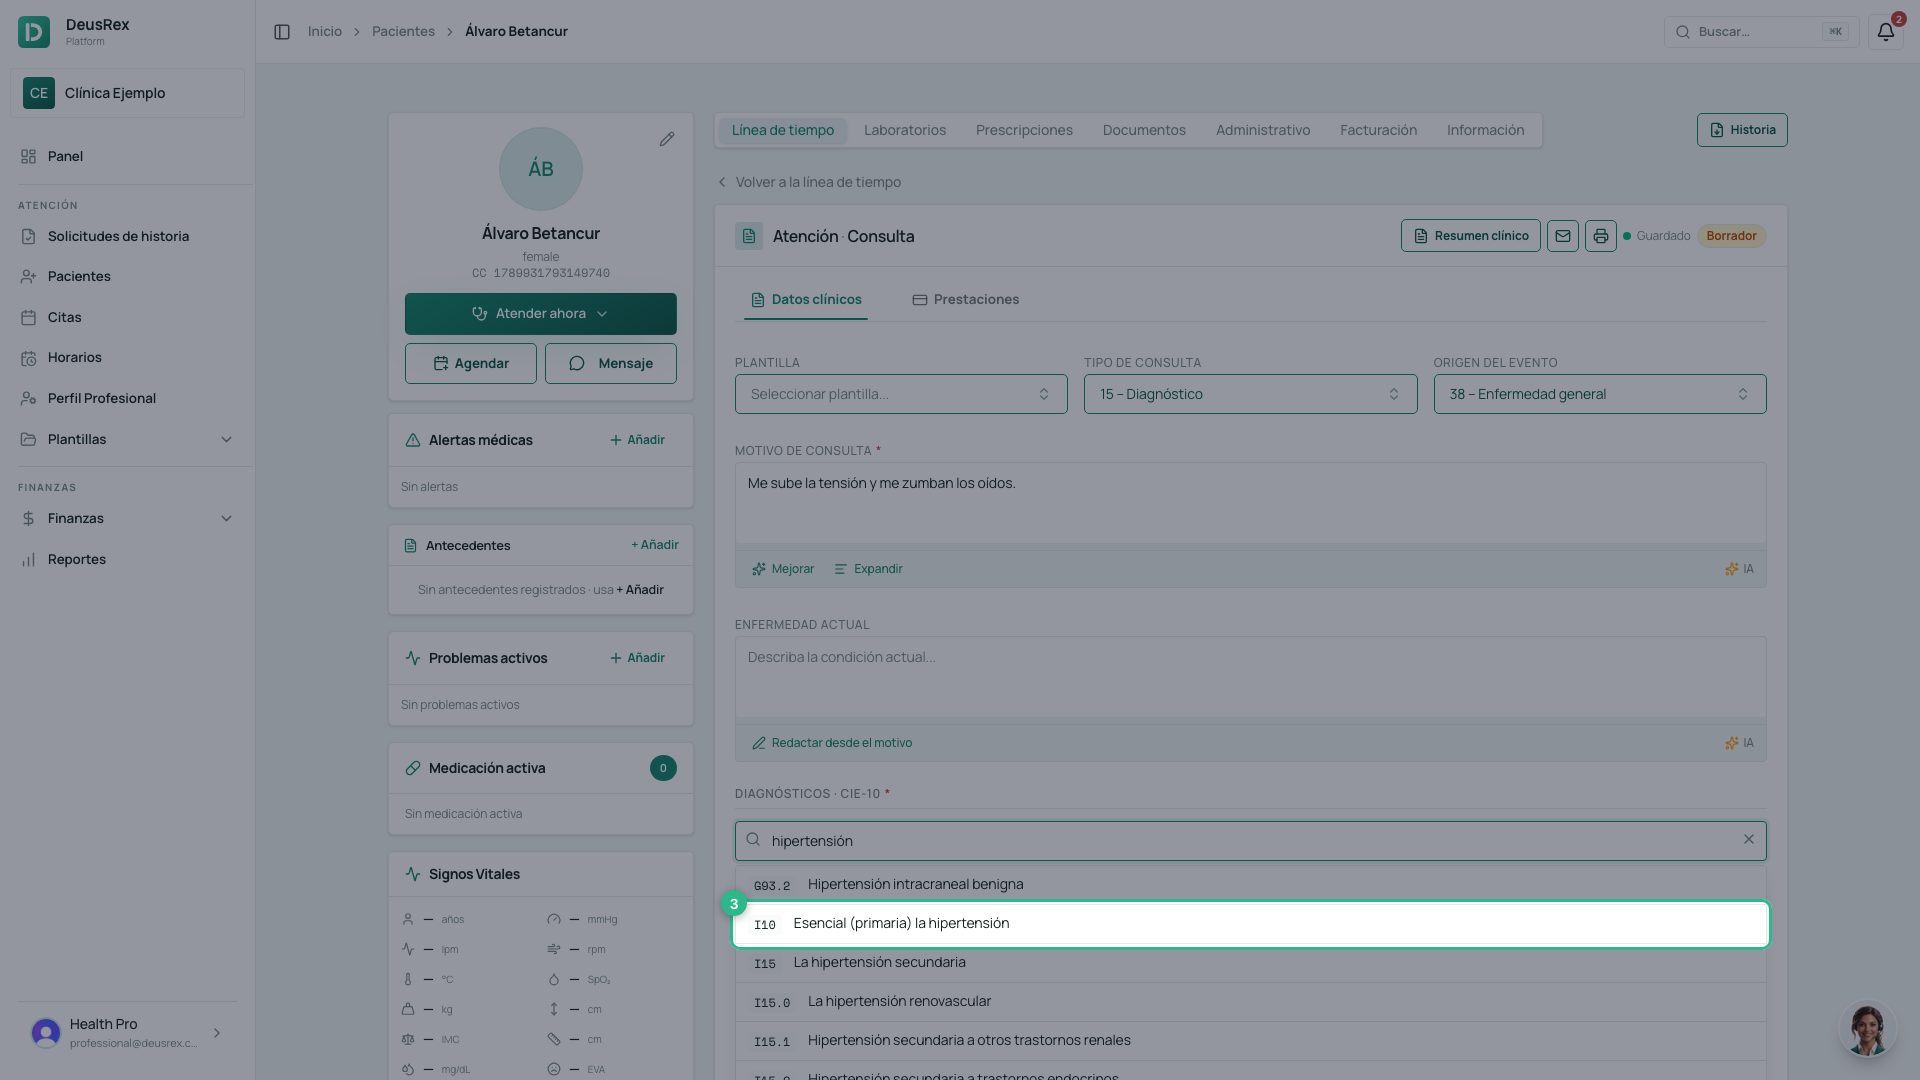
- Pick the matching ICD-10 code from the list. It is added the moment you click it; there is nothing to confirm.
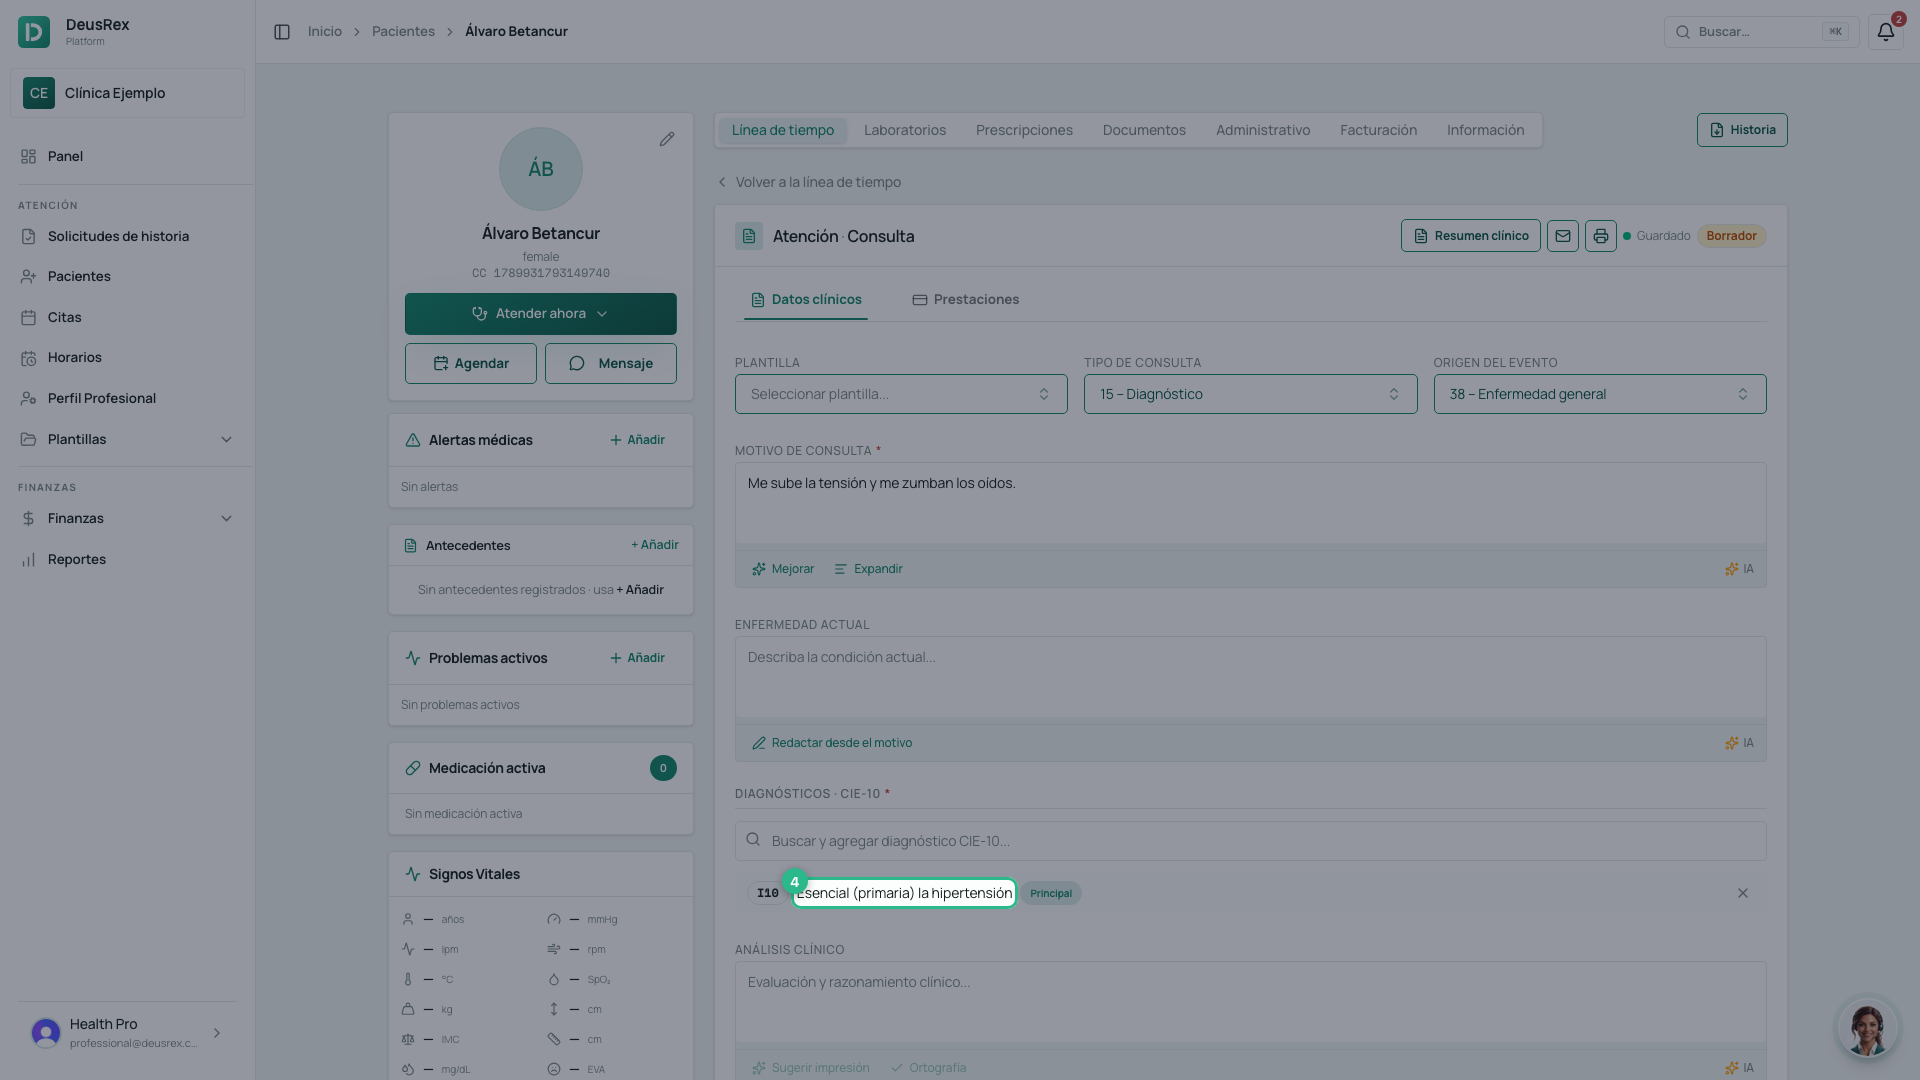
- The diagnosis stays in the consultation’s list.
- Add as many diagnoses as you need, one at a time.
The order decides which one is principal
The first one you add is the principal diagnosis; the rest are recorded as related. There is no selector: the order decides it, and the Principal badge confirms it in the list.
This matters more than it looks. When you sign the consultation, the principal diagnosis moves onto the patient’s problem list, and it is the one the exam suggestions use. If you get the order wrong, remove the diagnosis with the ✕ and add them again in the right order.
Tip
Search by symptom or by common name: the search box finds the exact code without you having to memorise it.